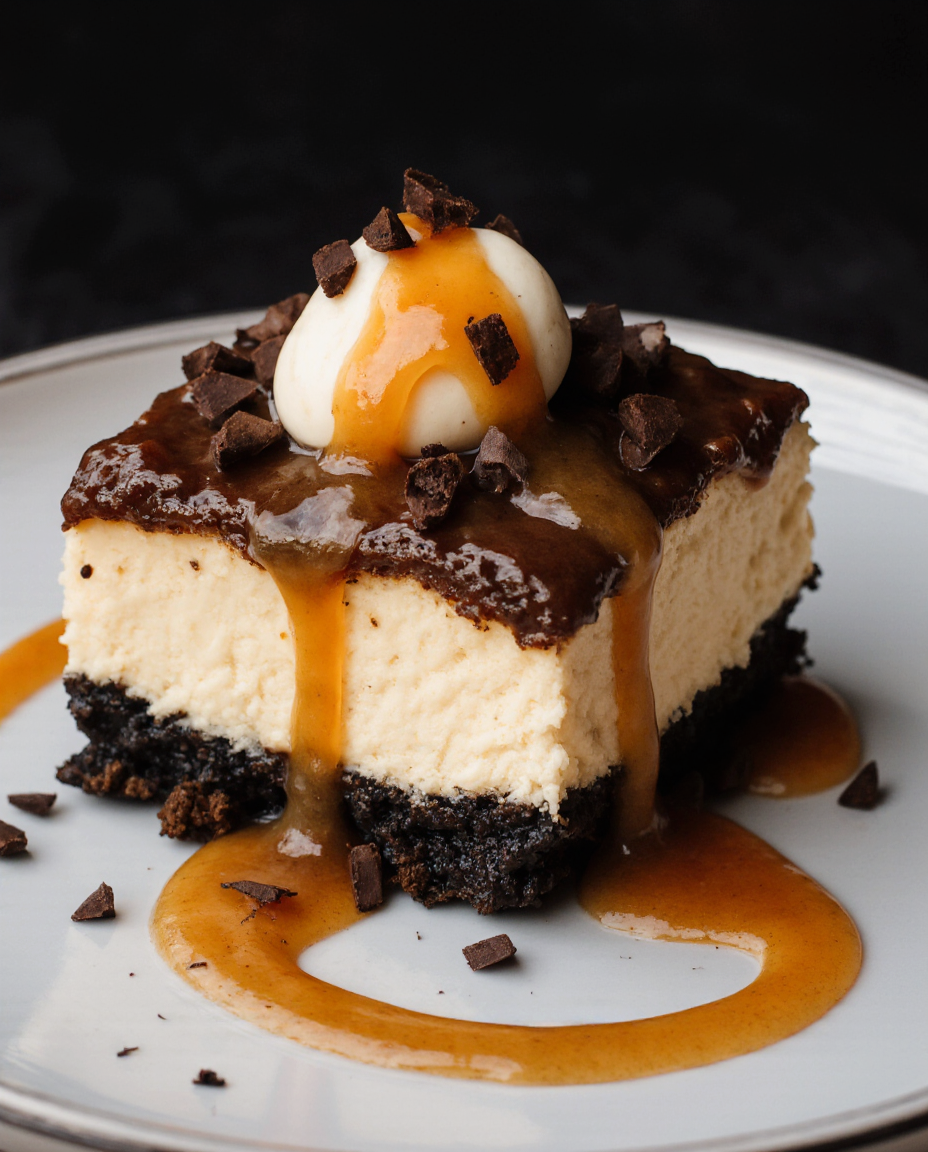
Salted Caramel Chocolate Chunk Cheesecake Bars
Salted Caramel Chocolate Chunk Cheesecake Bars
These cheesecake bars achieve perfect texture through precise temperature control and ingredient ratios that prevent cracking while maintaining creamy density. The method focuses on crust compaction that stays crisp under the filling, cheesecake emulsion that incorporates air without overbeating, caramel integration that swirls without sinking, and chocolate distribution that creates pockets without affecting structure. Everything here works for standard home ovens with techniques that ensure clean slices and professional results without water baths or special equipment.
Why this recipe works
Crust compaction science. The graham cracker crust uses precise butter-to-crumb ratio that creates firm base without becoming greasy or crumbly. Pressing firmly and pre-baking ensures the crust stays crisp under the moist filling rather than becoming soggy. The 10-minute bake at 325°F sets the structure without over-browning.
Cheesecake emulsion control. Starting with properly softened cream cheese and adding ingredients in specific order creates stable emulsion that bakes evenly without cracking. The eggs incorporated one at a time prevent overbeating that incorporates too much air, while the sour cream adds tang and moisture without thinning the structure.
Temperature management. 325°F is the sweet spot for bar-style cheesecake—hot enough to set the proteins but gentle enough to prevent rapid rise and fall that causes cracking. The gradual cooling process (oven off with door ajar, then room temp, then refrigerator) prevents thermal shock.
Caramel integration technique. Thinning the caramel slightly with heavy cream makes it fluid enough to swirl but thick enough to hold its position. The strategic dolloping and minimal swirling creates visual appeal without compromising the cheesecake structure or causing sinkage.
Chocolate chunk distribution. Using semi-sweet chocolate chunks rather than chips provides better flavor and melt texture. Folding them in at the end ensures even distribution without overmixing the batter. The chunks stay distinct rather than fully incorporating into the batter.
Ingredients (cups & tablespoons only)
Graham Cracker Crust
- 2 cupsgraham cracker crumbs
- 1/4 cupgranulated sugar
- 1/2 cupbutter, unsalted, melted
- 1 pinchsalt
Cheesecake Filling
- 24 ozcream cheese, softened
- 3/4 cupgranulated sugar
- 3 largeeggs, room temperature
- 1/2 cupsour cream
- 2 tspvanilla extract
- 1 cupsemi-sweet chocolate chunks
Salted Caramel Swirl
- 1/2 cupcaramel sauce
- 1 tspflaky sea salt
- 1 tbspheavy cream
Toppings & Garnish
- 2 tbspcaramel sauce
- 1/4 cupchocolate chunks
- 1/2 tspflaky sea salt
Recipe
- Prep pan and oven: Preheat oven to 325°F. Line 9×9 inch baking pan with parchment paper, leaving overhang on two sides for easy removal. Lightly grease exposed pan areas.
- Make crust: In medium bowl, combine graham cracker crumbs, sugar, and salt. Add melted butter and mix until crumbs are evenly moistened and mixture holds together when squeezed.
- Press and bake crust: Transfer crumb mixture to prepared pan. Press firmly into even layer using flat-bottomed cup or measuring cup. Bake 10 minutes until lightly fragrant and set. Cool while preparing filling.
- Start filling: In stand mixer with paddle attachment, beat softened cream cheese on medium-low until completely smooth and no lumps remain, about 2 minutes. Scrape bowl thoroughly.
- Add sugar and eggs: With mixer on low, gradually add sugar until incorporated. Add eggs one at a time, mixing just until each egg disappears before adding the next. Scrape bowl after each addition.
- Finish filling: Mix in sour cream and vanilla until just combined. Remove bowl from mixer and fold in chocolate chunks with spatula until evenly distributed.
- Prepare caramel swirl: In small bowl, mix caramel sauce with heavy cream until smooth and slightly thinned. This makes it easier to swirl.
- Assemble and swirl: Pour cheesecake filling over cooled crust. Drop caramel by spoonfuls over surface. Using knife or skewer, swirl gently through filling in figure-8 pattern.
- Bake: Bake 30-35 minutes until edges are set but center still jiggles slightly when pan is gently shaken. The center should read 150°F on instant-read thermometer.
- Cool properly: Turn oven off and prop door open with wooden spoon. Let cheesecake cool in oven 1 hour. Transfer to wire rack to cool completely to room temperature.
- Chill and serve: Refrigerate uncovered at least 4 hours, preferably overnight. Before serving, top with additional caramel, chocolate chunks, and flaky salt. Cut into 16 bars with hot knife.
The gradual cooling process is crucial for preventing cracks—don’t rush this step or move the pan while the cheesecake is still warm.
Crust technique & texture
Crumb consistency
Graham crackers should be finely ground but not powdery. The texture should resemble coarse sand. Too fine makes dense crust; too coarse won’t bind properly.
Butter distribution
Melted butter should coat all crumbs evenly. The mixture should hold together when squeezed but not feel greasy. If too dry, add more butter 1 tbsp at a time.
Pressing method
Use flat-bottomed cup to press crumbs firmly and evenly. The crust should be compact but not compressed into a solid mass. This creates crisp texture that holds together when cut.
Filling emulsion & mixing science
Cream cheese preparation. Properly softened cream cheese is essential for smooth emulsion. Cold cream cheese won’t incorporate properly, leaving lumps that won’t bake out. The ideal temperature is 65-70°F—it should yield to pressure but still hold its shape.
Mixing order importance. Beating cream cheese alone first ensures no lumps remain before adding other ingredients. Adding sugar gradually prevents graininess. Incorporating eggs one at a time prevents overbeating that incorporates too much air, which can cause cracking during baking.
Temperature sensitivity. All ingredients should be at room temperature to prevent the fat in the cream cheese from seizing. Cold ingredients can break the emulsion, resulting in grainy texture rather than smooth creaminess.
Scraping frequency. Scrape the bowl and paddle thoroughly after each addition. Cream cheese tends to stick to the sides and bottom, creating pockets of unmixed ingredients that affect final texture.
Final mixing technique. Once eggs are incorporated, mix as little as possible. Overbeating at this stage incorporates excess air and develops gluten-like proteins that can make the cheesecake tough rather than creamy.
Caramel integration & swirling
The caramel should be fluid enough to swirl but thick enough to hold its position without sinking to the bottom or blending completely into the batter.
Caramel preparation levels
- Too thick: Won’t swirl properly, sits on surface. Thin with heavy cream 1 tsp at a time.
- Too thin: Sinks to bottom, disappears into batter. Use less cream or reduce caramel slightly.
- Ideal consistency: Slowly ribbons off spoon, holds shape briefly before settling.
Warm caramel slightly if it’s too thick to work with, but don’t make it hot—this can start cooking the cheesecake batter where it touches.
Common mistakes (and quick fixes)
- Cracked surface: Overbaked or cooled too quickly. Use thermometer (150°F center) and follow gradual cooling method. Cracks can be covered with toppings.
- Soggy crust: Underbaked crust or filling too wet. Ensure crust is fully baked before adding filling and don’t overmix batter.
- Lumpy filling: Cold cream cheese or insufficient mixing. Ensure proper softening and beat cream cheese alone until completely smooth.
- Caramel sinking: Caramel too thin or batter overmixed. Use thicker caramel and fold gently when swirling.
- Greasy texture: Overbeating or cream cheese too warm. Mix just until combined and ensure ingredients are proper temperature.
- Chocolate sinking: Chocolate chunks too small or batter too thin. Use proper chunks and ensure batter is thick enough to support them.
- Sticking to pan: Insufficient parchment or greasing. Use parchment with overhang and grease exposed pan areas thoroughly.
Substitutions & variations
Different bases
- Oreo cookies instead of graham
- Ginger snaps for spicy twist
- Shortbread cookies for buttery flavor
Different chocolates
- Milk chocolate for sweeter version
- Dark chocolate for intense flavor
- White chocolate for contrast
Different additions
- 1 tsp instant espresso for mocha
- 1/2 cup peanut butter swirled in
- 1/4 cup toasted pecans or walnuts
Lighter options
- Reduced-fat cream cheese
- Greek yogurt instead of sour cream
- Light caramel sauce
Holiday versions
- Pumpkin: 1/2 cup puree + spices
- Peppermint: crushed candy canes
- Eggnog: nutmeg + rum extract
Dietary needs
- Gluten-free graham crackers
- Dairy-free cream cheese alternatives
- Vegan caramel sauce
When substituting cream cheese, full-fat produces best results. Reduced-fat versions may affect texture and require slight baking time adjustments.
Serving & presentation
- Cutting technique: Use hot, clean knife for each cut. Wipe blade between cuts for clean edges. Cut into 16 even squares for standard portions.
- Plating style: Serve on individual dessert plates with extra caramel drizzle. The layers should be visible in the cross-section.
- Garnish timing: Add final caramel, chocolate chunks, and sea salt just before serving to maintain texture contrast and visual appeal.
- Temperature service: Serve chilled but not ice-cold. Remove from refrigerator 15-20 minutes before serving for optimal flavor and texture.
- Accompaniments: Optional whipped cream, vanilla ice cream, or fresh berries provide contrast to the rich, sweet bars.
Batching & make-ahead
Crust preparation
Make and bake crust up to 2 days ahead. Store covered at room temperature. The pre-baking helps it stay crisp.
Complete bars
Bars keep 5 days refrigerated. Flavor improves over first 24 hours. Add toppings just before serving.
Freezing
Freeze up to 3 months. Wrap individual bars tightly. Thaw in refrigerator overnight. Texture may be slightly denser.
Equipment notes
- Pan size: 9×9 inch square pan provides ideal depth for bar-style cheesecake. 8×8 will be thicker and require longer baking; 9×13 will be thinner and bake faster.
- Mixer type: Stand mixer with paddle attachment works best, but hand mixer is fine. Mix on medium-low to prevent incorporating too much air.
- Temperature tools: Instant-read thermometer ensures perfect doneness (150°F center). Oven thermometer verifies actual oven temperature.
- Parchment paper: Essential for clean removal. Leave 2-inch overhang on two opposite sides for handles.
- Cutting tools: Sharp chef’s knife dipped in hot water provides cleanest cuts. Wipe clean between each cut.
Nutrition (estimated)
| Nutrient | Amount |
|---|---|
| Calories | ~380 kcal |
| Total Fat | 25 g |
| Saturated Fat | 15 g |
| Carbohydrates | 35 g |
| Total Sugars | 28 g |
| Fiber | 1 g |
| Protein | 6 g |
| Sodium | ~280 mg |
| Calcium | ~8% DV |
Numbers are estimates and will vary based on specific ingredients, especially cream cheese fat content, caramel brand, and chocolate type. This is a rich dessert best enjoyed in moderation.
Storage & shelf life
- Refrigeration: Store in airtight container up to 5 days. The flavor actually improves over the first 24-48 hours as the ingredients meld.
- Freezing: Freeze individual bars up to 3 months. Wrap tightly in plastic then foil. Thaw in refrigerator overnight.
- Room temperature: Safe for up to 2 hours during serving. Do not leave out longer due to dairy content.
- Texture changes: The crust may soften slightly over time but remains enjoyable. The cheesecake becomes denser when frozen and thawed.
- Make-ahead ideal: Best made 1 day ahead for flavor development and clean slicing. The extended chilling time improves texture.
- Travel considerations: Transport in chilled container. The bars hold their shape well but should be kept refrigerated until serving.
FAQ
Can I use whipped cream cheese instead of block?
Not recommended—whipped cream cheese contains stabilizers and more air, which can affect texture and cause the cheesecake to collapse or become too soft.
My caramel sank to the bottom—what happened?
Your caramel was likely too thin or your batter was overmixed. Next time, use thicker caramel and fold it in more gently. The caramel should be thick enough to hold its shape when dolloped.
Can I double this recipe for a 9×13 pan?
Yes—double all ingredients and use 9×13 pan. Baking time may be slightly longer (35-40 minutes). Check for 150°F internal temperature in center.
Why did my cheesecake crack?
Most common causes: overbaking, rapid temperature change, or overmixing. Use thermometer, follow gradual cooling method, and mix just until combined.
Can I use chocolate chips instead of chunks?
Yes, but chunks provide better texture and melt. Chocolate chips are designed to hold their shape, so they won’t create the same melty pockets.
How do I know when it’s done baking?
The edges should be set and the center should jiggle slightly when gently shaken. An instant-read thermometer should read 150°F in the center.
Cook notes
- Room temperature ingredients are non-negotiable for smooth emulsion.
- Don’t overmix after adding eggs—this incorporates too much air.
- Use instant-read thermometer for perfect doneness every time.
- Gradual cooling prevents cracks—don’t rush this process.
- Chill thoroughly before cutting—overnight is ideal for clean slices.
- Hot knife for cutting ensures beautiful, clean-edged bars.