Raspberry Thumbprint Cookies with Cream Cheese Icing

Raspberry Thumbprint Cookies with Cream Cheese Icing
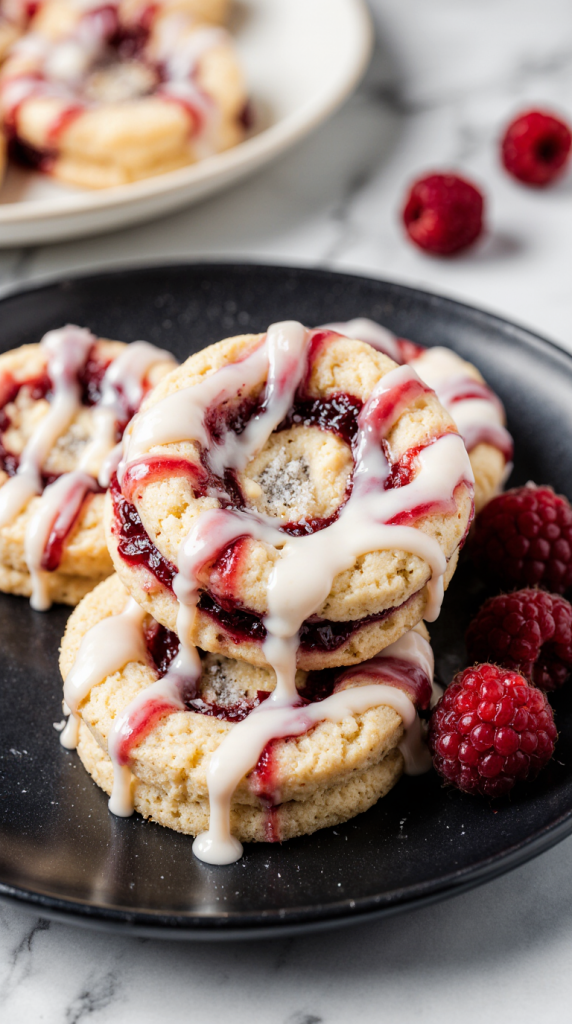
These thumbprint cookies achieve the ideal shortbread texture—crisp edges with a tender, melt-in-your-mouth center that doesn’t spread or crack. The method focuses on proper creaming for structure, gentle flour incorporation to prevent toughness, and precise baking to preserve the jam filling’s brightness. The cream cheese icing adds tang without overwhelming the buttery base. All measurements are volume-based with clear visual cues for each stage.
Why this recipe works
Butter temperature control. Room temperature butter creams properly with sugar, creating tiny air pockets that give the cookies lift without leavening. Too cold and the dough is crumbly; too warm and cookies spread excessively. The ideal butter temperature is around 65-67°F—cool to the touch but easily indented with light pressure. This specific temperature range allows for maximum air incorporation during creaming while maintaining enough structure to hold the cookie shape during baking.
Egg yolk only. Using just the yolk provides richness and binding without the drying properties of egg whites. The fat in yolks contributes to the tender, shortbread-like texture while the lecithin acts as an emulsifier, creating a more stable dough that holds its shape during baking. Whole eggs would add too much moisture and protein, resulting in a cake-like texture rather than the desired delicate crumb.
Minimal flour development. Mixing just until the dough comes together prevents gluten formation, ensuring a delicate, crumbly texture rather than a tough, bread-like one. Overmixing develops the gluten strands that make cookies chewy rather than tender. The “just combined” stage is critical—you should still see a few streaks of flour that will hydrate during resting.
Proper indentation technique. Creating adequate space for jam prevents overflow during baking while ensuring each cookie has sufficient filling. The right depth-to-width ratio is key—too shallow and jam bubbles over; too deep and the cookie structure weakens. The ideal well should be about 1/2 inch deep and wide enough to hold 1/2 teaspoon of jam without touching the edges.
Balanced icing consistency. The cream cheese icing is thin enough to drizzle but thick enough to hold its shape, adding flavor contrast without making the cookies overly sweet. The tang from cream cheese cuts through the butteriness of the cookie and the sweetness of the jam, creating a sophisticated flavor profile that elevates these beyond basic thumbprint cookies.
Ingredients (cups & tablespoons only)
Cookie Dough
- 1 cupunsalted butter, room temperature
- 1/2 cupgranulated sugar
- 1large egg yolk
- 2 tspvanilla extract
- 2 cupsall-purpose flour, spooned & leveled
- 1/4 tspsalt
Filling & Icing
- 1/2 cupseedless raspberry jam
- 4 ozcream cheese, room temperature
- 1 cuppowdered sugar, sifted
- 2-3 tbspmilk or cream
- 1/2 tspvanilla extract
Recipe
- Prep: Preheat oven to 350°F. Line baking sheets with parchment paper. Proper oven temperature is critical—use an oven thermometer to verify accuracy. Home ovens can be off by 25°F or more, significantly affecting baking time and cookie texture.
- Cream butter & sugar: In a large bowl, beat butter and sugar on medium-high until light and fluffy, about 2 minutes. Scrape bowl well. The mixture should pale in color and increase slightly in volume. Proper creaming creates the cookie’s structure—undermixed dough spreads excessively; overmixed incorporates too much air.
- Add wet ingredients: Beat in egg yolk and vanilla until fully incorporated, about 30 seconds. Scrape the bowl again to ensure even mixing. The yolk should be completely emulsified with no streaks visible.
- Add dry ingredients: Add flour and salt. Mix on low just until dough comes together and no dry streaks remain. Do not overmix. The dough will be soft but should clean the sides of the bowl. If it seems crumbly, the butter was too cold; if sticky, too warm.
- Portion dough: Scoop 1 tablespoon portions of dough. Roll into smooth balls between your palms. Consistent sizing ensures even baking. For perfect rounds, roll with light pressure using circular motions.
- Create indentations: Place balls 2 inches apart on baking sheets. Use your thumb, the end of a wooden spoon, or a round 1/2 teaspoon to make deep indentations. The well should be substantial but not go through to the baking sheet.
- Fill with jam: Spoon about 1/2 teaspoon raspberry jam into each indentation, filling about 3/4 full. Leave space for the jam to bubble and expand during baking without overflowing.
- Bake: Bake 12-14 minutes until edges are lightly golden. The jam should be bubbly. Rotate sheets halfway through for even browning. Cookies continue to set as they cool, so remove when edges are just colored.
- Cool: Let cookies cool on baking sheet for 5 minutes before transferring to a wire rack to cool completely. This allows them to firm up enough to handle without breaking but prevents bottoms from steaming and becoming soft.
- Make icing: Beat cream cheese until smooth. Add powdered sugar, then 2 tablespoons milk and vanilla. Add more milk if needed for drizzling consistency. The ideal icing should ribbon off the whisk—thick enough to hold shape but thin enough to flow.
- Finish: Drizzle cooled cookies with icing. Let set 30 minutes before serving or storing. Icing will form a slight crust but remain soft underneath.
Cookies continue to firm up as they cool. Don’t judge doneness by color alone—look for set edges and slightly puffed centers that have lost their wet sheen.
Shaping techniques
Ball consistency
Dough should be soft but not sticky. If it sticks to your hands, chill 15 minutes. If crumbly, the butter was too cold or you need 1-2 tsp milk. The ideal dough temperature for shaping is cool but pliable—about 68-70°F. Warmer dough spreads more during baking.
Indentation tools
Thumb works but can be uneven. For uniform wells, use the rounded end of a wooden spoon, a small jar, or the back of a round measuring spoon. The end of a thick-handled wooden spoon (about 1/2 inch diameter) creates perfect, consistent wells every time.
Jam filling
Fill wells 3/4 full to allow for bubbling without overflow. If jam is too thick to spoon easily, warm slightly or thin with 1 tsp water. Seedless jam works best as seeds can create texture issues and burn more easily during baking.
Mixing & structure (why the order matters)
Creaming stage. Properly creamed butter and sugar should be pale and fluffy, creating the foundation for the cookie’s texture. Under-creaming results in dense cookies; over-creaming incorporates too much air, causing spreading. The sugar crystals cut through the butter, creating tiny air pockets that expand during baking. This mechanical leavening is what gives shortbread its characteristic lift without chemical leaveners. The ideal creaming time is 2-3 minutes on medium speed—long enough to incorporate air but not so long that the butter becomes too warm.
Egg incorporation. Adding the yolk after creaming helps emulsify the mixture. The yolk’s lecithin helps bind fat and water, creating a more stable dough that holds its shape during baking. Add the yolk gradually while mixing on medium-low to prevent the emulsion from breaking. A broken emulsion appears curdled and can lead to greasy cookies with poor structure.
Flour addition. Mixing just until the flour disappears prevents gluten development. Shortbread relies on minimal gluten for its characteristic tender, crumbly texture. Overmixing makes cookies tough. When you add the flour, mix on the lowest speed possible and stop as soon as no dry patches remain. The dough will continue to hydrate as it rests.
Chilling considerations. This dough typically doesn’t require chilling if butter is the correct temperature. If your kitchen is warm (above 75°F), chill shaped cookies 15 minutes before baking to prevent spreading. Chilling solidifies the butter, reducing spread and allowing the cookies to set before the butter melts completely.
Baking & timing
These cookies bake quickly and have a narrow window between underdone and overbaked. The edges should show the first signs of golden coloring while the centers remain pale. Since ovens vary, test one sheet first to dial in your timing. Convection ovens bake faster and more evenly—reduce temperature by 25°F or baking time by 2-3 minutes if using convection.
Visual cues
- Perfect: Light golden edges, set surface, jam bubbling but not burning, centers slightly puffed
- Underbaked: Pale overall, doughy texture after cooling, jam not properly set
- Overbaked: Dark edges, jam darkened or caramelized, dry texture, bitter aftertaste
- Uneven: Some cookies darker—rotate sheet halfway through baking, ensure consistent sizing
Cookies firm up significantly as they cool. Remove when they look slightly underdone for perfect texture once cooled. The carryover cooking during the initial cooling on the sheet completes the baking process without drying them out.
Common mistakes (and quick fixes)
- Cookies spread too much: Butter too soft or dough overmixed. Chill dough 30 minutes before baking next batch. Ensure proper measuring—too little flour also causes spreading.
- Cookies too dry/crumbly: Too much flour or overbaked. Measure flour correctly (spoon and level); reduce baking time by 1-2 minutes. Overbaking evaporates moisture, creating dry texture.
- Jam bubbles over: Wells too shallow or overfilled. Make deeper indentations; fill only 3/4 full. If jam consistently bubbles over, your oven may be running hot—reduce temperature by 25°F.
- Indentations disappear during baking: Dough too soft or indentations too shallow. Chill shaped cookies 15 minutes; make deeper wells. The wells should be substantial—about 1/2 the height of the dough ball.
- Icing too runny: Added too much liquid. Add more powdered sugar 1 tbsp at a time until desired consistency. If it becomes too sweet, add a pinch of salt to balance.
- Icing too thick: Not enough liquid. Add milk/cream 1 tsp at a time until drizzling consistency. The ideal icing should ribbon off the spoon—thick enough to hold lines but thin enough to flow smoothly.
- Cookies stick to parchment: Underbaked or moved too soon. Ensure proper baking time; let cool 5 minutes on sheet before moving. Quality parchment prevents sticking better than wax paper.
Substitutions & variations
Different fillings
- Apricot, strawberry, or blackberry jam
- Lemon curd (reduce baking time 1-2 min)
- Chocolate ganache (fill after baking)
- Dulce de leche or caramel sauce
Traditional thumbprints
- Roll dough balls in chopped walnuts
- Use almond extract instead of vanilla
- Add 1/4 cup finely ground almonds to dough
- Coat in crushed pecans before baking
Festive adaptations
- Use red & green jam for Christmas
- Add 1/2 tsp almond extract + red jam for Valentine’s
- Color icing with food coloring for events
- Use patriotic jam colors for Fourth of July
Allergy-friendly
- Gluten-free: use 1:1 GF flour blend
- Dairy-free: use vegan butter & cream cheese
- Vegan: use vegan butter, flax egg, vegan cream cheese
- Lower sugar: reduce sugar to 1/3 cup, use sugar-free jam
Enhanced profiles
- Lemon: add 1 tsp zest to dough
- Almond: replace vanilla with almond extract
- Spiced: add 1/4 tsp cinnamon to dough
- Orange: add 1 tsp zest + orange extract
Different toppings
- Simple powdered sugar glaze
- Melted chocolate drizzle
- Royal icing for decorating
- Lemon glaze (powdered sugar + lemon juice)
Any substitution may affect texture and baking time. Adjust visual cues accordingly. When making multiple substitutions, test one cookie first to ensure the results meet expectations before committing a full batch.
Icing techniques
The ideal icing consistency should ribbon off the spoon or whisk—thick enough to hold its shape but thin enough to flow smoothly. Test on a plate before drizzling cookies. If the icing holds a line for 3-5 seconds before melting back into itself, it’s perfect. Too thin and it will run off the cookies; too thick and it will clump rather than drizzle.
Application methods
- Spoon drizzle: Dip spoon in icing and wave over cookies in zigzag pattern. Works well for casual, rustic presentation.
- Piping bag: Use a small zip-top bag with corner snipped for precise lines. Allows for controlled, even application and intricate patterns.
- Fork method: Dip fork tines in icing and flick over cookies. Creates fine, delicate lines for professional-looking results.
- Bottle: Use a squeeze bottle for restaurant-style presentation. Offers the most control and consistency for large batches.
If icing sets too quickly, warm slightly or add a few drops of milk. If too runny, let sit 5-10 minutes to thicken. Icing can be made ahead and stored covered at room temperature for up to 2 days—whisk briefly before using to restore consistency.
Batching & make-ahead
Half batch (14-15 cookies)
- Butter: 1/2 cup
- Sugar: 1/4 cup
- Egg yolk: 1/2 (beat whole yolk, use half)
- Vanilla: 1 tsp
- Flour: 1 cup
- Salt: 1/8 tsp
- Jam: 1/4 cup
- Cream cheese: 2 oz
- Powdered sugar: 1/2 cup
Double batch
Double all ingredients. Mix in two batches if your mixer bowl is small. Bake one sheet at a time, rotating position halfway through. Icing can be made in one batch. For large quantities, consider making dough a day ahead and refrigerating—the flavor actually improves with overnight rest.
Make-ahead timeline
Dough: 3 days refrigerated or 3 months frozen
Baked cookies (no icing): 5 days at room temp
Fully iced: 3 days refrigerated
Freeze: 2 months (un-iced)
Jam filling: 2 weeks refrigerated
Icing: 2 days at room temperature
Equipment notes
- Mixer vs hand mixing: Stand mixer or hand mixer recommended for proper creaming. Can be mixed by hand but requires more effort and time. For hand mixing, ensure butter is very soft and use a sturdy wooden spoon.
- Baking sheets: Light-colored aluminum sheets bake most evenly. Dark sheets may require reduced baking time or lower temperature. Avoid insulated baking sheets—they prevent proper browning.
- Parchment vs silicone: Parchment prevents sticking and promotes even browning. Silicone mats also work but may slightly increase baking time. Never bake directly on aluminum sheets—cookies will spread more and bottoms may burn.
- Cookie scoops: #60 or 1-tablespoon scoop ensures uniform size and even baking. Can use measuring spoon but results less consistent. For professional results, weigh dough balls (approximately 20g each).
- Cooling racks: Essential for proper cooling and preventing soggy bottoms. If unavailable, cool on parchment-lined counter. Ensure adequate air circulation around each cookie.
- Oven thermometer: Crucial for accuracy. Home ovens often run 25°F hot or cold, affecting baking time significantly. Place in center of oven for most accurate reading.
Nutrition (estimated per cookie)
| Nutrient | Amount |
|---|---|
| Calories | ~120 kcal |
| Total Fat | 7 g |
| Saturated Fat | 4 g |
| Trans Fat | 0 g |
| Cholesterol | 25 mg |
| Sodium | 40 mg |
| Total Carbohydrates | 14 g |
| Dietary Fiber | 0.5 g |
| Total Sugars | 8 g |
| Added Sugars | 7 g |
| Protein | 1 g |
| Vitamin D | 0 mcg |
| Calcium | 10 mg |
| Iron | 0.5 mg |
| Potassium | 25 mg |
Nutrition calculated with full-fat ingredients. Values are estimates and will vary based on specific brands and exact measurements used. Using reduced-fat cream cheese decreases calories by approximately 10-15 per cookie. Each cookie contains approximately 60% calories from fat, 35% from carbohydrates, and 5% from protein.
Storage & freezing
- Room temperature: Un-iced cookies keep 5 days in an airtight container. Iced cookies keep 3 days. Store in a single layer or with parchment between layers to prevent sticking.
- Refrigeration: Iced cookies can be refrigerated up to 1 week. Bring to room temperature before serving. The cold can make the cookies harder and affect texture.
- Freezing (unbaked): Shape dough balls, freeze on baking sheet, then transfer to freezer bags. Bake frozen, adding 1-2 minutes to baking time. Dough keeps 3 months frozen.
- Freezing (baked): Freeze un-iced cookies in single layer, then transfer to airtight container. Thaw at room temperature. Baked cookies freeze better than iced ones.
- Separate layers: Store cookies with parchment between layers to prevent sticking, especially when iced. Never stack iced cookies directly on each other.
- Reviving stale cookies: Warm in 300°F oven for 3-5 minutes to refresh texture. The brief heating revives the buttery flavor and crisp edges.
FAQ
Can I use salted butter?
Yes, but omit the added salt in the recipe. Salted butter varies in salt content, so the flavor may be slightly different. Most salted butter contains about 1/4 teaspoon salt per stick, so adjust accordingly.
Why did my indentations disappear during baking?
The dough was too warm or the indentations weren’t deep enough. Chill shaped cookies 15 minutes before baking and make sure wells are substantial—they should be about half the height of the dough ball.
Can I make these without a mixer?
Yes, but cream the butter and sugar thoroughly by hand—this will take 3-4 minutes of vigorous beating. The texture may be slightly denser. Ensure butter is properly softened for easier mixing.
My jam bubbled over—what happened?
Either the wells were too full or not deep enough. Fill only 3/4 full and ensure wells are adequately deep to contain the jam as it expands. Some jams have more pectin and bubble less.
Can I use different sizes?
Yes, adjust baking time accordingly: 2-tsp size bake 10-12 minutes; 2-tbsp size bake 15-18 minutes. Watch for visual doneness cues. Larger cookies may need slightly deeper wells.
Why are my cookies tough?
Overmixing or too much flour. Mix just until combined and measure flour correctly (spoon and level). Tough cookies indicate too much gluten development.
Can I use homemade jam?
Yes, but ensure it’s thick enough. Runny jam will not set properly and may make cookies soggy. If using homemade jam, consider reducing it further or adding a thickener.
Baker notes
- Measure flour correctly. Spoon into measuring cup and level with knife; packed cups make dry cookies. For most accurate results, weigh flour—1 cup should be 120-125g.
- Don’t overfill jam wells. The jam expands significantly during baking—leave room for bubbling. Overfilled wells create messy cookies and can cause sticking.
- Cool completely before icing. Warm cookies will melt the icing and create a mess. The icing should be at room temperature for proper setting.
- Rotate baking sheets. For even browning, rotate sheets front to back and top to bottom halfway through baking. Most ovens have hot spots that affect baking.
- Test one cookie first. Ovens vary—bake one test cookie to dial in your perfect timing before committing a full batch. This prevents wasting ingredients.
- Use quality ingredients. European-style butter with higher fat content creates superior texture. Real vanilla extract makes a noticeable difference over imitation.
- Patience with cooling. Rushing the cooling process can cause breakage. Allow full cooling on racks for best texture and handling.