Lemon Garlic Glazed Salmon
Lemon Garlic Glazed Salmon
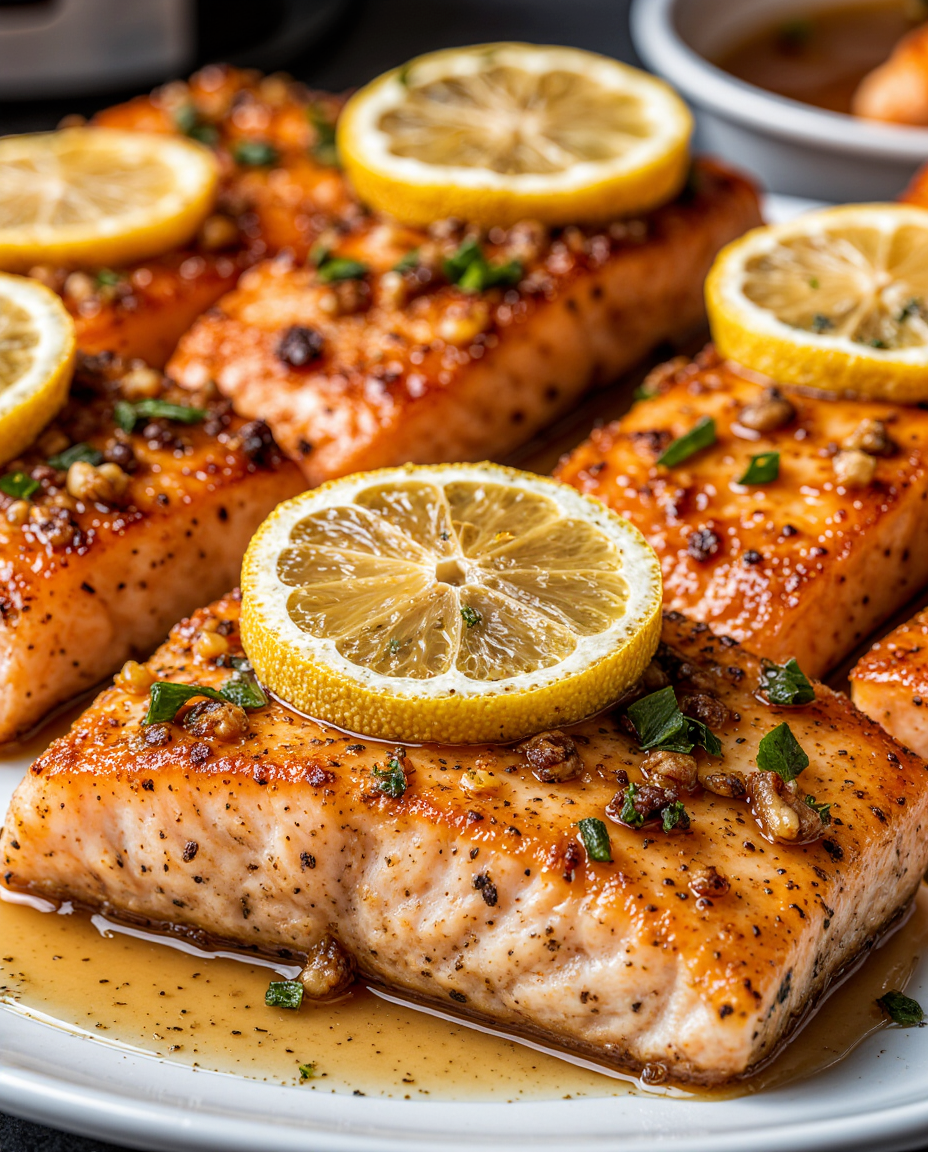
This salmon preparation achieves restaurant-quality crispy skin and perfectly cooked flesh through precise temperature control and timing. The method focuses on starting with a cold skillet for maximum skin crispiness, using the stovetop-to-oven technique for even cooking, and creating a balanced glaze that complements rather than overwhelms the salmon’s natural richness. The lemon garlic glaze provides bright acidity and sweetness that cuts through the fish’s oils while the gentle oven finish ensures moist, flaky results.
Why this recipe works
Cold start technique. Beginning with a cold skillet allows the salmon fat to render slowly as the pan heats, creating maximum crispiness without burning. This method gives the skin time to release its moisture and fat before the exterior browns too quickly. The gradual temperature increase ensures the skin becomes crackling-crisp while the flesh remains perfectly cooked. This contrasts with most protein cooking methods that start with a hot pan, but for fish skin, the cold start is transformative.
Stovetop-to-oven method. Starting on the stovetop develops the crispy skin foundation, then transferring to the oven ensures even cooking without overcooking the exterior. The 400°F oven temperature is ideal—hot enough to cook the salmon quickly but gentle enough to prevent the delicate proteins from seizing and becoming dry. This two-stage approach separates the high-heat skin crisping from the gentle interior cooking, giving perfect control over both textures.
Glaze timing precision. Applying the lemon garlic glaze after flipping the salmon protects it from burning while allowing it to caramelize gently in the oven. The honey in the glaze provides sweetness that balances the lemon’s acidity, while the butter creates a rich emulsion that clings to the salmon. Adding the glaze at this specific moment prevents the sugars from burning on the hot stovetop while still achieving beautiful caramelization.
Temperature-guided doneness. Using an instant-read thermometer removes the guesswork from salmon cooking. The target temperature of 125°F for medium-rare accounts for carryover cooking during resting, resulting in perfectly moist, flaky fish. This precision prevents the common problem of overcooked, dry salmon while ensuring food safety. The temperature gradient from skin to flesh creates textural contrast that elevates the eating experience.
Acid-fat balance. The lemon juice cuts through the salmon’s natural oils without overwhelming the fish’s flavor. The honey provides just enough sweetness to balance the acidity, while the garlic adds savory depth. The red pepper flakes contribute subtle heat that enhances rather than competes with the other flavors. This balanced approach creates a glaze that complements the salmon rather than masking its natural qualities.
Ingredients (cups & tablespoons only)
Salmon & Preparation
- 4 (6 oz)salmon fillets, skin-on
- 1 tbspolive oil
- 1/2 tspsalt
- 1/4 tspblack pepper
Lemon Garlic Glaze
- 3 tbspfresh lemon juice
- 2 tbsphoney
- 3 clovesgarlic, minced
- 1 tbspbutter
- 1 tsplemon zest
- 2 tbspfresh parsley, chopped
- 1/4 tspred pepper flakes
Recipe
- Prep salmon: Remove 4 salmon fillets from refrigerator 15 minutes before cooking. Pat skin and flesh completely dry with paper towels. Brush skin lightly with 1 tbsp olive oil and season with 1/2 tsp salt and 1/4 tsp pepper.
- Cold start technique: Place large oven-safe skillet cold on stovetop. Arrange salmon fillets skin-side down in skillet. Turn heat to medium-high. The cold start allows fat to render slowly for maximum crispiness.
- Crisp skin: Cook skin-side down 6-8 minutes without moving. Press gently with spatula occasionally to ensure even contact. Skin is ready when golden brown and crispy, and salmon is cooked about 2/3 of the way up the sides.
- Make glaze: While skin crisps, combine 3 tbsp lemon juice, 2 tbsp honey, 3 minced garlic cloves, and 1/4 tsp red pepper flakes in small saucepan. Heat gently until honey dissolves, then whisk in 1 tbsp butter until emulsified.
- Flip and glaze: Carefully flip salmon fillets using thin spatula. Brush flesh side generously with lemon garlic glaze. Work quickly to minimize heat loss from the skillet.
- Oven finish: Transfer skillet to preheated 400°F oven. Bake 4-6 minutes until internal temperature reaches 125°F for medium-rare. The glaze should be bubbly and lightly caramelized.
- Rest and garnish: Remove from oven and transfer salmon to warm plates. Let rest 5 minutes to allow juices to redistribute. Garnish with 1 tsp lemon zest and 2 tbsp fresh parsley before serving.
The salmon will continue cooking during resting, reaching 130-135°F for perfect medium-rare. For well-done salmon, cook to 140°F internal temperature, but note this will result in drier flesh.
Nutrition (estimated)
| Nutrient | Amount |
|---|---|
| Calories | ~320 kcal |
| Total Fat | 18 g |
| Saturated Fat | 3 g |
| Trans Fat | 0 g |
| Cholesterol | 85 mg |
| Sodium | 380 mg |
| Total Carbohydrates | 6 g |
| Dietary Fiber | 1 g |
| Total Sugars | 4 g |
| Added Sugars | 3 g |
| Protein | 34 g |
| Vitamin D | 15 mcg |
| Calcium | 25 mg |
| Iron | 1 mg |
| Potassium | 650 mg |
Nutrition calculated with Atlantic salmon fillets and standard ingredient measurements. Values are estimates and will vary based on salmon type and specific brands used.
Salmon selection & preparation
Salmon varieties
Atlantic: mild, buttery, widely available. Sockeye: robust flavor, firm texture. Coho: delicate, medium fat content. King/Chinook: richest, highest fat. Farmed vs wild affects flavor and texture significantly.
Quality indicators
Bright color, firm flesh that springs back. Pleasant ocean scent, not fishy. Moist appearance without liquid pooling. Tight, smooth skin without gaps. Silver skin should be intact and shiny.
Preparation tips
Check for pin bones with fingers—remove with tweezers if present. Score skin lightly if fillet curls. Bring to room temperature for even cooking. Pat thoroughly dry—moisture prevents crisping.
Crispy skin science & techniques
Salmon skin contains significant fat and moisture that must be properly managed to achieve crackling-like crispiness. The cold start technique revolutionizes this process by controlling the rate of fat rendering and moisture evaporation.
Skin transformation stages
- Initial contact (cold pan): Fat begins to render slowly, skin adheres to surface
- Moisture release (2-4 minutes): Water evaporates, skin begins to contract
- Fat rendering (4-6 minutes): Subcutaneous fat melts, skin becomes translucent
- Crisping phase (6-8 minutes): Skin bubbles and becomes golden brown and crispy
- Release stage (ready to flip): Skin naturally releases from pan when properly crisped
The key is patience—don’t attempt to move the salmon until the skin releases naturally. Forcing it early will tear the skin and prevent proper crisping.
Glaze balance & emulsion science
The lemon garlic glaze achieves perfect harmony through careful balancing of acidic, sweet, and savory elements. Each component serves specific purposes in both flavor and texture.
Flavor components
Lemon juice: bright acidity cuts fat. Honey: sweetness balances acid. Garlic: savory depth. Butter: rich mouthfeel. Red pepper: subtle heat. Parsley: fresh finish. Lemon zest: aromatic lift.
Emulsion creation
The butter acts as emulsifier between acidic lemon juice and oily salmon. Honey provides viscosity. Gentle heating ensures stable emulsion. Proper emulsion prevents separation and ensures even coating.
Application timing
Applied after flipping to prevent burning. Oven caramelizes without scorching. Multiple thin layers better than single thick coat. Final garnish adds fresh aroma lost during cooking.
Cooking technique & temperature control
Salmon proteins coagulate at relatively low temperatures, making precise temperature control essential for perfect texture. The stovetop-to-oven method provides the ideal cooking environment.
Temperature stages
- 110-115°F: Proteins begin to coagulate, flesh becomes opaque
- 120-125°F: Medium-rare—juicy, translucent center
- 130-135°F: Medium—moist, slightly pink center
- 140-145°F: Medium-well—fully opaque, slightly dry
- 150°F+: Well-done—dry, flaky, loss of moisture
Carryover cooking adds 5-10°F during resting. Remove salmon from oven when thermometer reads 5°F below your target doneness for perfect results.
Common mistakes (and quick fixes)
- Sticking skin: Moving too early or insufficient oil. Wait for natural release—don’t force. Ensure pan is properly seasoned and skin is dry before starting.
- Rubbery skin: Overcooked or too high heat. Use medium-high, not high heat. The skin should be crisp, not tough. If rubbery, it was cooked too quickly.
- Burnt glaze: Applied too early or oven too hot. Apply only after flipping and watch carefully in oven. Honey burns around 350°F.
- Dry salmon: Overcooked or wrong temperature. Use thermometer and remove at 125°F. Even medium-rare salmon continues to 130°F during resting.
- Curling fillets: Skin not scored or uneven thickness. Score skin lightly or press with spatula during initial cooking. Choose evenly thick fillets.
- Bitter garlic: Burned or old garlic. Add garlic to glaze off direct heat. Use fresh, plump garlic cloves rather than pre-minced.
- Pale skin: Insufficient cooking time or wet skin. Cook full 6-8 minutes skin-side down and ensure thorough drying before cooking.
- White albumin: Overcooked or too high heat. This is coagulated protein—cook gentler and shorter. It’s edible but indicates overcooking.
Substitutions & variations
Different seafood
- Arctic char: similar fat content
- Steelhead trout: salmon-like
- Sea bass: firm, white flesh
- Halibut: mild, flaky texture
Different acids
- Orange: sweeter, milder
- Lime: sharper, tropical
- Yuzu: complex, aromatic
- Grapefruit: bitter, bright
Different sweets
- Maple syrup: earthy sweetness
- Brown sugar: caramel notes
- Agave: neutral sweet
- Mirin: sweet rice wine
Different herbs
- Dill: classic pairing
- Tarragon: anise flavor
- Basil: sweet, aromatic
- Chives: mild onion
Different techniques
- Pan-sear only: quicker
- Broil: fast caramelization
- Grill: smoky flavor
- Air fryer: 400°F 12 min
Special diets
- Dairy-free: olive oil instead of butter
- Whole30: omit honey
- Low-carb: reduce honey 50%
- Paleo: use raw honey
Any substitution may affect cooking time, texture, and flavor balance. When substituting fish, adjust cooking time based on thickness and fat content.
Serving & pairing suggestions
Side dishes
Quinoa pilaf: absorbs glaze. Roasted asparagus: complements lemon. Couscous with herbs: quick, light. Sautéed spinach: simple, nutritious. Rice: neutral base for sauce.
Vegetable pairings
Roasted broccoli: hearty, healthy. Green beans almondine: classic. Zucchini noodles: light, low-carb. Roasted carrots: sweet contrast. Brussels sprouts: earthy balance.
Wine pairings
Sauvignon Blanc: citrus notes. Pinot Grigio: crisp, clean. Chardonnay: buttery, oaked. Rosé: fruity, dry. Pinot Noir: light red option.
Equipment notes
- Skillet type: Cast iron provides best heat retention for even crisping. Stainless steel offers good fond development. Oven-safe essential—avoid plastic handles.
- Pan size: 12-inch skillet ideal for 4 fillets without crowding. Overcrowding creates steam that softens skin. Work in batches if necessary.
- Thermometer: Instant-read digital most accurate. Test in thickest part of thickest fillet. Learn visual cues as backup—opaque flesh, flaky texture.
- Utensils: Thin metal spatula for easy flipping. Fish spatula ideal with angled edge. Tongs can tear delicate flesh—use spatula preferred.
- Cutting tools: Sharp chef’s knife for herb chopping. Microplane for lemon zesting. Garlic press optional but minced garlic works fine.
- Measuring tools: Liquid measuring cup for honey and juice. Measuring spoons for small amounts. Digital scale most accurate for salmon portions.
- Saucepan: Small saucepan for glaze preparation. Heavy-bottomed prevents scorching. Non-reactive materials won’t affect acidic glaze flavor.
Storage & reheating
- Refrigeration: Store in airtight container up to 3 days. Cool completely before covering. The skin will soften upon storage—this is normal.
- Freezing: Freeze up to 2 months. Wrap tightly in plastic then foil. Thaw in refrigerator overnight before reheating.
- Reheating methods: Oven preferred—300°F for 10-15 minutes until warm. Air fryer excellent for restoring crispiness. Microwave makes rubbery—avoid.
- Crisp restoration: For leftover salmon, broil 2-3 minutes skin-side up to restore crispiness. Watch carefully to prevent burning.
- Cold applications: Flake cold salmon into salads. Use in sandwiches or wraps. Add to pasta dishes. Incorporate into omelets or frittatas.
- Food safety: Cool within 2 hours of cooking. Reheat to 145°F internal temperature. Do not refreeze previously frozen raw salmon.
FAQ
Can I use skinless salmon?
Yes, but reduce initial searing time to 3-4 minutes per side and watch carefully. The skin provides protection and fat, so skinless fillets cook faster and may be slightly drier.
My salmon stuck to the pan—what happened?
Likely moved too early or insufficient oil. Wait for the natural release—don’t force it. The skin will release when properly crisped. Ensure pan is properly heated and salmon is dry.
Can I make this with frozen salmon?
Yes, but thaw completely in refrigerator overnight and pat very dry. Frozen salmon releases more moisture, so cooking time may increase by 2-3 minutes.
How do I know when the skin is ready to flip?
The skin will release naturally from the pan and appear golden brown and crispy. The salmon will be cooked about 2/3 of the way up the sides. If it resists flipping, it needs more time.
Can I prepare the glaze ahead of time?
Yes, make up to 3 days ahead and store refrigerated. Gently reheat before using. Fresh herbs and zest are best added just before serving for maximum flavor.
What if I don’t have an oven-safe skillet?
Sear skin-side down completely on stovetop (8-10 minutes), then finish with lid on for 2-3 minutes. The results won’t be identical but will still be delicious.
Can I use bottled lemon juice?
Fresh is strongly preferred for brightness and flavor. If using bottled, reduce amount by 25% as it’s more concentrated and lacks fresh aroma. The zest is essential for balance.
Cook notes
- Dry salmon thoroughly
- Use the cold start technique
- Don’t move the salmon
- Use a thermometer
- Rest before serving
- Add fresh garnish
- Customize the glaze
- Use the cold start technique