Hot Honey Chicken Drumsticks
Hot Honey Chicken Drumsticks
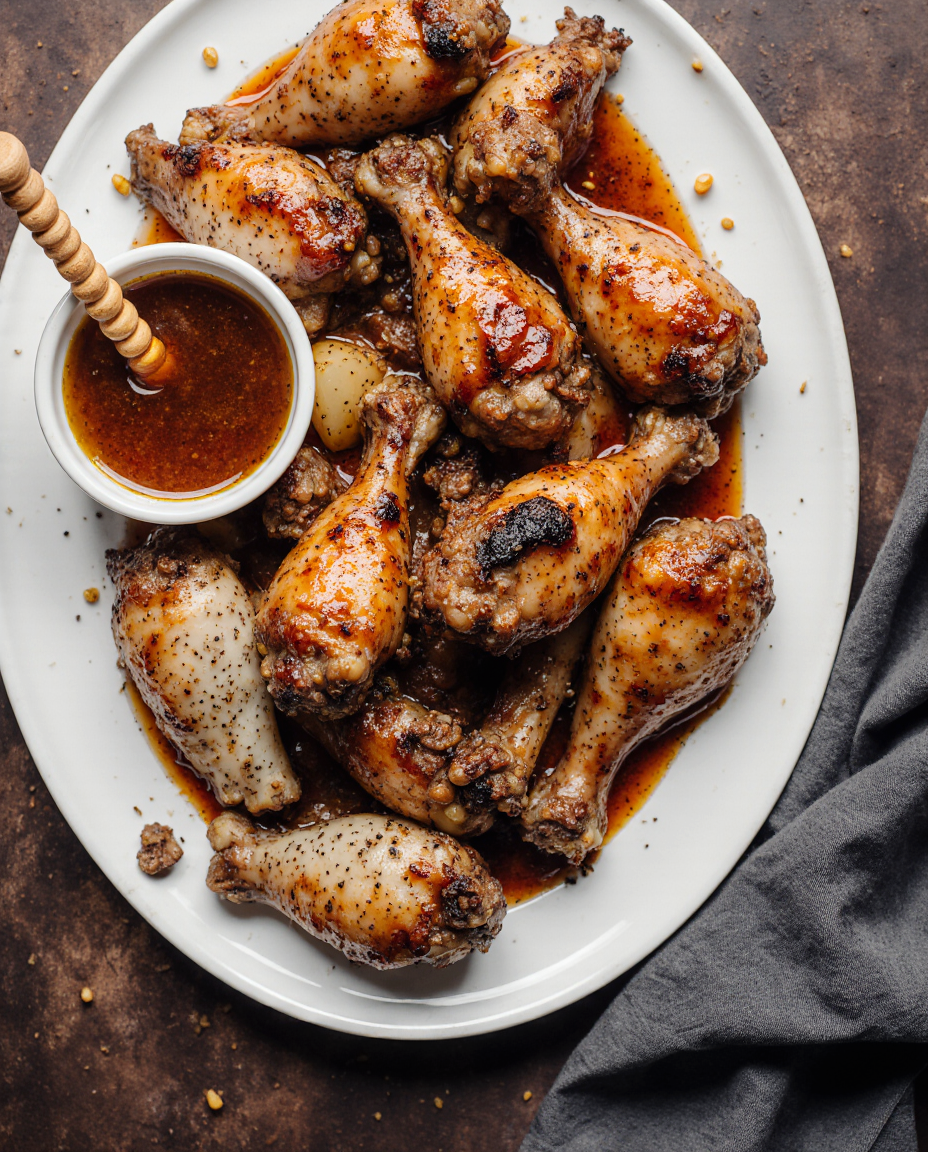
These drumsticks achieve maximum crispiness through proper drying techniques and elevated baking, while the hot honey glaze balances spicy and sweet without burning. The method focuses on rendering fat slowly for crackling-like skin texture, applying glaze at the perfect moment to caramelize without scorching, and creating layered heat that builds gradually rather than overwhelming. The result is restaurant-quality crispy skin with juicy meat and complex flavor development.
Why this recipe works
Crispy skin methodology. Starting with thoroughly dried chicken skin and baking at 400°F on an elevated rack creates the ideal environment for crispy skin development. The high heat rapidly renders subcutaneous fat while the rack allows air circulation that prevents steaming. The seasoning blend includes paprika not just for color but for its mild sweetness that enhances browning through caramelization. This technique produces skin with audible crunch without the mess of deep frying.
Glaze timing precision. Applying the honey glaze during the final 5-10 minutes of cooking allows caramelization without burning. Honey contains fructose that caramelizes around 230°F, but can burn quickly at higher temperatures. By adding it after the skin is already crispy and nearly cooked, the glaze transforms into a sticky, shiny coating rather than burning or making the skin soggy. The butter in the glaze also helps create a glossy finish and rich mouthfeel.
Layered heat development. The hot sauce provides immediate vinegar-based heat, the red pepper flakes offer mid-palate warmth, and the optional cayenne delivers lingering background heat. This triple-heat approach creates complexity rather than one-dimensional spiciness. The vinegar in both the hot sauce and additional apple cider vinegar cuts through the sweetness and fat, preventing the dish from becoming cloying.
Maillard reaction optimization. The initial high-heat baking phase develops flavor through Maillard reaction—the chemical process between amino acids and reducing sugars that creates complex, savory flavors. The dry seasoning rub enhances this reaction while the elevated rack ensures even browning on all surfaces. This foundational flavor development makes the final glaze application more impactful.
Resting importance. Allowing the drumsticks to rest for 5 minutes after baking lets the juices redistribute throughout the meat. This prevents dry chicken and ensures each bite is moist and flavorful. The resting period also allows the glaze to set properly, creating a tacky rather than runny coating that adheres to the chicken.
Ingredients (cups & tablespoons only)
Chicken & Seasoning
- 8chicken drumsticks
- 2 tbspolive oil
- 1 tspsalt
- 1/2 tspblack pepper
- 1 tspgarlic powder
- 1 tsppaprika
- 1/2 tsponion powder
Hot Honey Glaze
- 1/2 cuphoney
- 2 tbsphot sauce
- 1 tbspapple cider vinegar
- 1 tbspbutter
- 1/2 tspred pepper flakes
- 1/4 tspcayenne pepper
Recipe
- Prep chicken: Preheat oven to 400°F. Pat 8 drumsticks completely dry with paper towels. Moisture is the enemy of crispy skin—dry thoroughly inside crevices and both sides.
- Season chicken: In large bowl, toss dried drumsticks with 2 tbsp olive oil until evenly coated. Add 1 tsp salt, 1/2 tsp black pepper, 1 tsp garlic powder, 1 tsp paprika, and 1/2 tsp onion powder. Rub seasoning into all surfaces.
- Arrange for baking: Place wire rack over rimmed baking sheet. Arrange drumsticks in single layer with space between each. The rack elevates chicken for air circulation and prevents steaming.
- Initial bake: Bake 35-40 minutes until skin is golden brown and crispy. The internal temperature should reach 165°F when tested in thickest part away from bone.
- Make glaze: While chicken bakes, combine 1/2 cup honey, 2 tbsp hot sauce, 1 tbsp apple cider vinegar, 1 tbsp butter, 1/2 tsp red pepper flakes, and 1/4 tsp cayenne in small saucepan. Heat gently until butter melts and mixture is smooth.
- Glaze chicken: Remove chicken from oven after initial bake. Brush hot honey glaze generously over all surfaces of drumsticks. Return to oven for final 5-10 minutes.
- Caramelize glaze: Bake until glaze is bubbly and caramelized but not burned. Watch carefully—honey can burn quickly. The glaze should be sticky and shiny.
- Rest and serve: Remove from oven and let rest 5 minutes. This allows juices to redistribute and glaze to set. Serve with extra glaze for dipping if desired.
The total baking time may vary by 5-10 minutes depending on drumstick size and oven accuracy. Use internal temperature (165°F) as your primary doneness indicator.
Nutrition (estimated)
| Nutrient | Amount |
|---|---|
| Calories | ~380 kcal |
| Total Fat | 18 g |
| Saturated Fat | 5 g |
| Trans Fat | 0 g |
| Cholesterol | 145 mg |
| Sodium | 520 mg |
| Total Carbohydrates | 22 g |
| Dietary Fiber | 1 g |
| Total Sugars | 18 g |
| Added Sugars | 17 g |
| Protein | 32 g |
| Vitamin D | 0.2 mcg |
| Calcium | 25 mg |
| Iron | 1.5 mg |
| Potassium | 320 mg |
Nutrition calculated with skin-on drumsticks and standard ingredient measurements. Values are estimates and will vary based on chicken size and specific brands used.
Crispy skin science & techniques
Moisture management
Water steam-cooks rather than browns chicken skin. Patting dry removes surface moisture while salt drawing out internal moisture. The oil then creates a barrier that helps render fat while preventing steam formation.
Fat rendering
Chicken skin contains subcutaneous fat that must render out for crispiness. 400°F is ideal—hot enough to melt fat quickly but not so hot that skin burns before fat fully renders. The elevated rack allows fat to drip away.
Air circulation
Baking directly on a pan creates steam that softens skin. The wire rack allows hot air to circulate on all surfaces, creating even browning and preventing the bottom from becoming soggy from accumulated juices.
Glaze chemistry & application timing
The hot honey glaze transforms through several chemical processes during baking, each requiring specific temperature and timing considerations to achieve optimal results.
Glaze transformation stages
- Heating phase: Butter melts, honey thins, flavors meld (120-140°F)
- Application phase: Glaze adheres to crispy skin surface (140-160°F)
- Caramelization phase: Honey sugars brown and develop complexity (230-320°F)
- Setting phase: Glaze cools and becomes tacky (below 140°F)
- Burn threshold: Honey begins to smoke and bitter (350°F+)
The vinegar serves multiple purposes: it cuts sweetness, provides acidic balance, and helps prevent crystallization of the honey sugars. The butter adds richness and creates a smoother, glossier finish than honey alone.
Baking technique & temperature control
Proper oven temperature and rack positioning are crucial for achieving both food safety and ideal texture. Chicken must reach 165°F internally while developing crispy skin without burning.
Baking stages
- Initial phase (0-15 minutes): Skin begins to render fat, seasonings adhere, exterior dries further
- Middle phase (15-30 minutes): Fat continues rendering, skin begins to bubble and crisp, internal temperature rises steadily
- Final phase (30-40 minutes): Skin reaches maximum crispiness, internal temperature approaches 165°F
- Glaze phase (40-45 minutes): Glaze applied and caramelized, internal temperature finishes at 165°F+
- Rest phase (5 minutes): Juices redistribute, glaze sets, carryover cooking adds 5-10°F
Use an instant-read thermometer to check internal temperature in the thickest part of the drumstick, avoiding contact with the bone for accurate reading.
Heat balance & customization
The spicy element in hot honey chicken should complement rather than overwhelm the other flavors. Understanding the different types of heat allows for perfect customization to individual preferences.
Heat types
Vinegar heat (hot sauce): immediate, sharp. Capsaicin heat (pepper flakes): building, warming. Volatile heat (cayenne): lingering, back-of-throat. Each provides different experience and timing.
Heat levels
Mild: 1 tbsp hot sauce only. Medium: full recipe as written. Hot: double red pepper flakes. Extra hot: add 1/2 tsp cayenne. Customize by adjusting individual components rather than just increasing amounts.
Balancing heat
Too spicy? Add more honey or butter. Too sweet? Increase vinegar or hot sauce. One-dimensional? Add smoked paprika or garlic powder. Adjust in small increments and taste as you go.
Common mistakes (and quick fixes)
- Soggy skin: Not dried thoroughly or baked without rack. Pat skin completely dry and always use elevated rack. If already soggy, broil 2-3 minutes to crisp.
- Burnt glaze: Applied too early or oven too hot. Apply only during last 5-10 minutes. If burning occurs, remove immediately and brush off burnt portions.
- Rubbery skin: Overcooked or under-rendered fat. Ensure proper temperature and don’t overcook. The skin should be crisp, not tough and leathery.
- Bland chicken: Insufficient seasoning or not rubbed in. Season under skin if possible and be generous with salt. The glaze needs seasoned chicken as base.
- Sticky mess: Glaze too thick or applied too heavily. Thin glaze with 1 tsp water if too thick. Apply in thin, even layers rather than thick coating.
- Uneven cooking: Crowded pan or different sized drumsticks. Leave space between pieces and group by size. Rotate pan halfway through cooking if needed.
- Dry meat: Overcooked or not rested. Use thermometer and remove at 165°F. Always rest before serving to retain juices.
- Pale skin: Oven too cool or not baked long enough. Ensure proper preheat and full cooking time. The paprika should deepen color during baking.
Substitutions & variations
Different cuts
- Chicken wings: adjust time to 35-40 min
- Chicken thighs: bone-in, skin-on
- Chicken breast: cut into strips
- Whole chicken: spatchcocked
Different sweeteners
- Maple syrup: deeper flavor
- Brown sugar: caramel notes
- Agave nectar: neutral sweet
- Date syrup: rich, complex
Different spices
- Chipotle: smoky heat
- Gochujang: fermented heat
- Harissa: North African spice
- Sriracha: garlic-forward
Different techniques
- Grilling: smoky flavor
- Air fryer: 375°F 20-25 min
- Broiling: quick caramelization
- Slow cooker: then broil to crisp
Enhanced profiles
- Garlic herb: add rosemary
- Asian: soy + ginger
- BBQ: smoked paprika
- Lemon pepper: citrus zest
Special diets
- Lower sugar: reduce honey 25%
- Paleo: use raw honey
- Whole30: omit honey
- Keto: sugar-free syrup
Any substitution may affect cooking time, texture, and flavor balance. When substituting sweeteners, watch carefully as burning points vary significantly.
Serving & pairing suggestions
Side dishes
Coleslaw: cool, crunchy contrast. Cornbread: sweet, absorbs glaze. Roasted potatoes: hearty, neutral. Green salad: fresh, acidic. Mac and cheese: creamy, rich.
Dipping sauces
Ranch: cool, herby. Blue cheese: sharp, tangy. Extra hot honey: for heat lovers. Garlic aioli: rich, savory. Buttermilk dressing: light, refreshing.
Beverage pairings
IPA: hops cut sweetness. Lager: crisp, clean. Rosé: fruity, dry. Sweet tea: Southern classic. Lemonade: tart, refreshing.
Equipment notes
- Baking sheet: Rimmed sheet contains drippings and prevents oven mess. Dark sheets promote browning but watch for burning. Light sheets provide more even heating.
- Wire rack: Essential for crispy skin. Choose oven-safe rack that fits baking sheet. Non-stick coating prevents sticking but isn’t necessary with proper oiling.
- Instant-read thermometer: Most accurate doneness indicator. Digital models provide fastest reading. Test in thickest part of meat away from bone.
- Mixing bowls: Large enough to toss drumsticks comfortably. Glass or stainless steel won’t absorb flavors. Avoid wooden bowls that can harbor bacteria.
- Basting brush: Silicone brushes clean easily and don’t shed bristles. Natural bristle brushes provide better glaze application but require thorough cleaning.
- Saucepan: Small saucepan for glaze preparation. Heavy-bottomed prevents scorching. Non-reactive materials (stainless, enamel) won’t affect acidic glaze flavor.
- Tongs: For turning and handling hot chicken. Spring-loaded tongs provide better control. Silicone tips prevent scratching baking sheets.
Storage & reheating
- Refrigeration: Store in airtight container up to 4 days. Cool completely before covering. The glaze may crystallize slightly when chilled—this is normal.
- Freezing: Freeze up to 3 months. Wrap individually in foil then place in freezer bag. The texture may soften slightly upon thawing.
- Reheating methods: Oven preferred—350°F for 15-20 minutes until hot. Air fryer excellent for restoring crispiness. Microwave makes skin rubbery—avoid if possible.
- Crisp restoration: For leftover chicken, broil 2-3 minutes after reheating to restore crispiness. Watch carefully to prevent burning.
- Glaze refresh: If glaze becomes too thick, warm gently with 1 tsp water. Brush fresh glaze on reheated chicken for best appearance.
- Food safety: Cool within 2 hours of cooking. Reheat to 165°F internal temperature. Do not refreeze previously frozen raw chicken.
FAQ
Can I make this with boneless chicken?
Yes, but reduce cooking time to 20-25 minutes for boneless thighs or 15-20 minutes for breast pieces. The skin won’t be as crispy without the bone, but the flavor will still be excellent.
My glaze burned—what did I do wrong?
Likely applied too early or oven too hot. Honey burns around 350°F. Apply only during last 5-10 minutes and watch carefully. If your oven runs hot, reduce temperature to 375°F for glazing phase.
Can I make this less spicy?
Yes, reduce hot sauce to 1 tablespoon and omit cayenne and red pepper flakes. The vinegar in hot sauce provides flavor beyond heat, so don’t eliminate completely unless necessary.
How do I get the glaze to stick better?
Ensure chicken is hot when glazing and apply in thin, even layers. Let first layer set slightly before adding second if desired. The butter in the glaze helps with adhesion.
Can I prepare this ahead of time?
Yes, season chicken up to 24 hours ahead (uncovered in refrigerator helps dry skin). Make glaze up to 1 week ahead. Assemble and bake when ready to serve for best texture.
Why use a wire rack instead of baking directly on pan?
The rack allows air circulation on all sides for even crisping and prevents the bottom from steaming in accumulated juices. This is the single most important factor for crispy skin.
Can I double this recipe for a crowd?
Yes, but use two baking sheets and rotate them halfway through cooking. Don’t overcrowd—the drumsticks need space between for proper air circulation.
Cook notes
- Dry chicken thoroughly
- Use a wire rack
- Watch the glaze carefully
- Don’t skip the resting time
- Customize the heat level
- Use an instant-read thermometer
- Serve with cooling sides
- Use a wire rack