Garlic Butter Stuffed Mushrooms
Garlic Butter Stuffed Mushrooms
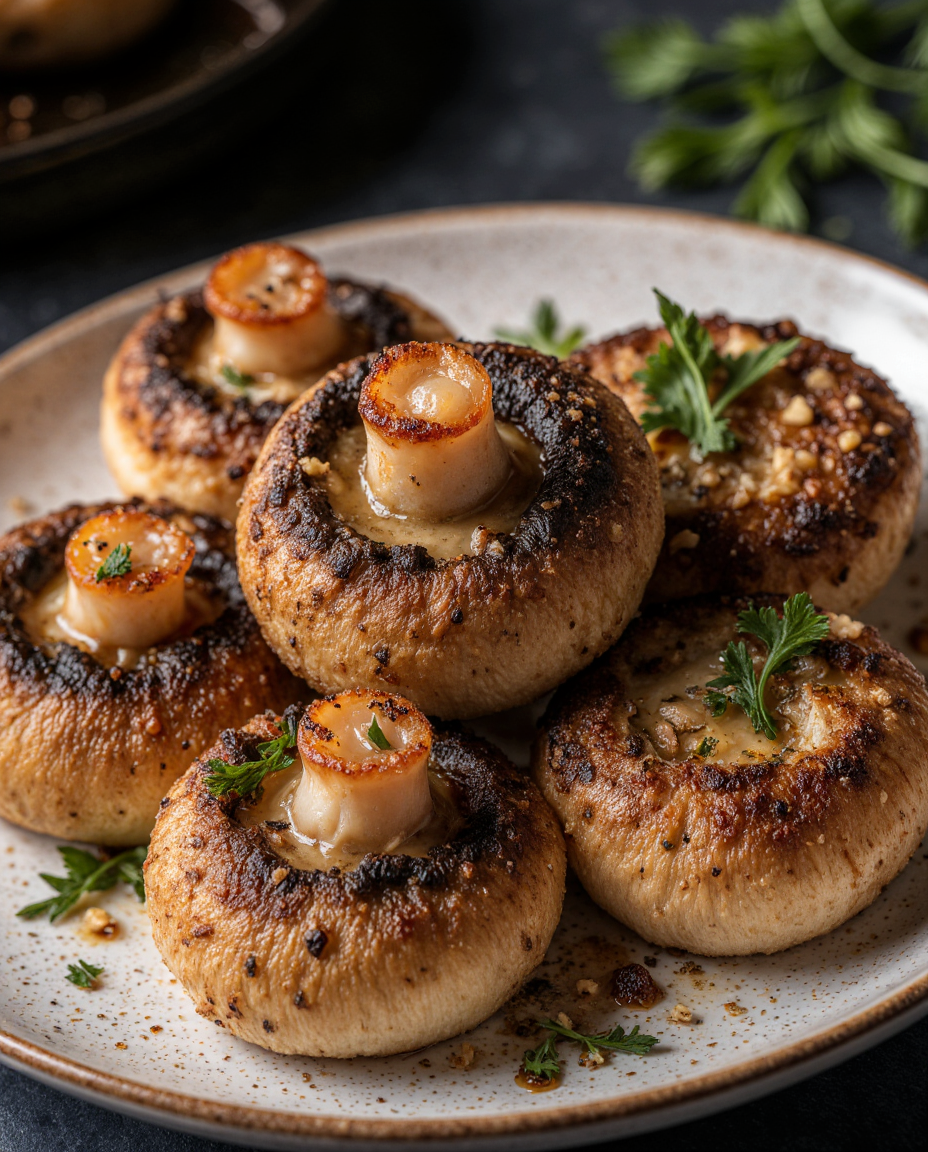
These stuffed mushrooms achieve perfect texture through mushroom selection that holds its shape during baking and filling formulation that stays put without drying out. The method focuses on moisture control that prevents sogginess, garlic preparation that maximizes flavor without burning, and baking temperature that cooks the mushrooms through while developing golden-brown tops. Everything here works for entertaining timing with techniques that ensure the mushrooms release their liquid properly, the filling maintains creamy texture, and the final result holds together for easy serving.
Why this recipe works
Mushroom size and variety selection. Cremini mushrooms (1.5-2 inch diameter) provide the ideal cup shape and meaty texture that holds up to baking without becoming mushy. Their deeper flavor compared to white button mushrooms stands up to the rich garlic butter filling, while their firm texture prevents collapse during the extended baking time needed to cook the filling through.
Moisture management system. The dual approach of brushing mushroom caps with oil and pre-baking the filling components controls liquid release. The oil creates a barrier that reduces mushroom water seepage into the filling, while cooking the aromatics first evaporates their moisture content, preventing a soggy final product. This careful moisture balance keeps the filling crisp-topped while ensuring the mushrooms cook through properly.
Filling structural engineering. The combination of breadcrumbs (absorbent), Parmesan (browning agent), and cream cheese (binder) creates a filling that holds its shape without becoming dry. The breadcrumbs absorb any released mushroom liquids while providing texture, the Parmesan promotes golden browning, and the cream cheese ensures cohesive filling that doesn’t crumble when bitten.
Flavor layering technique. Cooking the mushroom stems with garlic and shallot in butter before incorporating into the filling develops deep umami flavors. This approach transforms what would typically be discarded into a flavor powerhouse, while the gentle cooking prevents the garlic from burning and turning bitter during the final baking.
Temperature and timing precision. 375°F provides enough heat to cook the mushrooms through and brown the topping without burning the garlic or drying out the filling. The 20-25 minute window allows the mushrooms to release their liquid and become tender while the filling sets and develops appealing color and texture.
Ingredients (cups & tablespoons only)
Mushrooms & Base
- 24cremini mushrooms
- 2 tbspolive oil
- 1/2 tspsalt
- 1/4 tspblack pepper
Aromatics & Filling Base
- 4 tbspbutter, unsalted
- 4 clovesgarlic, minced
- 1/4 cupshallot, diced
- allmushroom stems, chopped
Filling Binders & Seasonings
- 1/4 cupParmesan, grated
- 1/4 cupbreadcrumbs
- 2 tbspcream cheese
- 2 tbspparsley, chopped
- 1/2 tsplemon juice
- 1/4 tspblack pepper
Optional Garnishes
- 2 tbspParmesan, grated
- 1 tbspparsley, chopped
- 1 tsplemon zest
Recipe
- Prep mushrooms: Preheat oven to 375°F. Wipe mushrooms clean with damp paper towel (don’t rinse). Gently twist stems to remove—reserve stems. Place mushroom caps on baking sheet.
- Season caps: Brush mushroom caps inside and out with olive oil. Season lightly with salt and pepper. This creates a moisture barrier and seasons the mushrooms from within.
- Prep filling components: Finely chop mushroom stems. Mince garlic and dice shallot. The pieces should be small enough to distribute evenly throughout the filling.
- Cook aromatics: Melt butter in skillet over medium heat. Add chopped mushroom stems, garlic, and shallot. Cook 5-6 minutes until softened and fragrant, but not browned. The mushroom stems should release their liquid and it should mostly evaporate.
- Make filling: Transfer cooked mixture to bowl. Add Parmesan, breadcrumbs, cream cheese, parsley, lemon juice, and pepper. Mix until well combined. The filling should hold together when pressed.
- Fill mushrooms: Using small spoon or piping bag, fill each mushroom cap generously with filling mixture, mounding slightly. Don’t overpack—the filling should be light but cohesive.
- Bake: Arrange stuffed mushrooms on parchment-lined baking sheet. Bake 20-25 minutes until mushrooms are tender when pierced with knife and filling is golden brown.
- Optional broil: For extra browning, broil 1-2 minutes at the end, watching carefully to prevent burning.
- Serve: Let rest 5 minutes before serving (filling will be very hot). Garnish with additional Parmesan and parsley if desired.
The filling can be made ahead, but assemble and bake just before serving for best texture—the mushrooms will release liquid as they sit.
Mushroom selection & preparation
Cleaning technique
Wipe with damp paper towel rather than rinsing. Mushrooms absorb water like sponges, which can make them soggy during baking. Remove any visible dirt gently.
Stem removal
Twist gently rather than cutting—this creates a cleaner pocket for filling. The stems should come out intact for easy chopping and use in the filling.
Size consistency
Select mushrooms of similar size for even cooking. If sizes vary, smaller ones may need less time, larger ones more. Consider sorting before baking.
Filling stability & texture control
Moisture balance. The cooked mushroom stems provide flavor but must be properly cooked to release their moisture before adding to the filling. Undercooked stems will continue releasing liquid during baking, potentially making the filling soggy. The breadcrumbs act as a moisture regulator, absorbing any excess liquid while providing texture.
Binding agents. The cream cheese provides creaminess and binding power without making the filling heavy. Its fat content helps carry the garlic and shallot flavors while ensuring the filling holds together when bitten. The Parmesan adds both flavor and additional binding through its protein content.
Flavor development. Cooking the aromatics in butter first transforms their character—shallot becomes sweet and mild, garlic loses its sharp bite, and mushroom stems develop deep umami. This step is crucial for complex flavor rather than raw, harsh notes.
Acid balance. The small amount of lemon juice brightens the rich filling without making it taste lemony. It cuts through the richness of the butter and cheese while enhancing the other flavors. Add it at the end to preserve its bright character.
Texture contrast. The filling should be creamy but with some texture from the breadcrumbs and chopped mushroom stems. Over-processing creates a pasty texture, while under-mixing may leave the filling crumbly. The ideal is cohesive but not uniform.
Baking technique & doneness
Temperature rationale. 375°F provides enough heat to cook the mushrooms through while browning the topping without burning. Higher temperatures may brown the filling too quickly before the mushrooms are tender, while lower temperatures won’t develop the desirable golden color and may make the mushrooms watery.
Pan selection. Use a baking sheet rather than a baking dish to allow moisture evaporation. Crowding in a dish creates steam that can make the mushrooms soggy. The mushrooms should have some space between them for air circulation.
Doneness testing. The mushrooms are done when they’re tender when pierced with a paring knife and the filling is golden brown. The mushrooms will continue to release liquid during baking—this is normal. Some liquid in the pan is expected, but the mushrooms shouldn’t be sitting in pools of water.
Resting importance. Let the mushrooms rest 5 minutes after baking. This allows the filling to set slightly (it will be very hot straight from the oven) and makes them easier to handle. The flavor also improves slightly as the components meld.
Broiling caution. If broiling for additional browning, watch constantly—the high heat can burn the filling quickly, especially the Parmesan and breadcrumbs. One to two minutes is usually sufficient for dramatic color improvement.
Common mistakes (and quick fixes)
- Soggy mushrooms: Overcrowded pan or undercooked filling components. Use baking sheet with space between mushrooms and cook aromatics until moisture evaporates.
- Filling falling out: Underfilled or wrong consistency. Fill generously and ensure filling holds together when pressed—add more cream cheese if too dry.
- Burnt garlic: Cooked at too high heat or too long. Cook aromatics over medium heat until fragrant but not browned.
- Rubbery mushrooms: Overbaked or wrong mushroom type. Use cremini rather than white buttons and check at 20 minutes.
- Dry filling: Too many breadcrumbs or overbaked. Measure breadcrumbs precisely and don’t overbake—the filling should be moist but set.
- Bland flavor: Underseasoned or poor quality Parmesan. Season each component and use freshly grated Parmesan rather than pre-shredded.
- Mushrooms shrinking: Normal—they release water during baking. Select larger mushrooms initially to account for shrinkage.
Substitutions & variations
Different varieties
- White button mushrooms
- Portobello minis (adjust time)
- Stuffing mushroom caps
Different cheeses
- Pecorino instead of Parmesan
- Goat cheese for tanginess
- Fontina for meltiness
Extra ingredients
- 2 tbsp cooked bacon crumbles
- 1/4 cup spinach, chopped
- 2 tbsp sun-dried tomatoes
Different binders
- Panko for extra crunch
- Gluten-free breadcrumbs
- Crushed crackers
Different herbs
- Thyme instead of parsley
- Chives for mild onion flavor
- Tarragon for licorice notes
Special diets
- Vegan: plant-based butter/cheese
- Dairy-free: nutritional yeast + oil
- Keto: almond flour instead of breadcrumbs
When substituting cheeses, consider meltability and salt content—hard, salty cheeses may need quantity adjustment, while soft cheeses may affect filling stability.
Serving & presentation
- Plating style: Arrange on serving platter with space between each mushroom. Group in clusters of 3-4 for visual appeal. The golden tops should face upward.
- Garnish placement: Sprinkle additional Parmesan and parsley just before serving for fresh color and flavor. A light dusting rather than heavy coating looks most appealing.
- Temperature service: Serve warm but not piping hot—the filling retains heat longer than the mushroom. 5 minutes resting makes them perfect eating temperature.
- Portion planning: 2-3 mushrooms per person as an appetizer, 4-5 as a side dish. They’re rich, so people tend to eat fewer than expected.
- Accompaniments: Serve with a simple green salad to cut the richness, or as part of an antipasto platter with cured meats and olives.
Batching & make-ahead
Filling preparation
Make filling up to 2 days ahead. Store in airtight container in refrigerator. Bring to room temperature before using for easier filling.
Complete assembly
Assemble up to 4 hours ahead. Store covered in refrigerator. Bring to room temperature 30 minutes before baking.
After baking
Best served immediately. Can be held in warm oven up to 30 minutes, but texture is best fresh from the oven.
Equipment notes
- Baking sheets: Light-colored, heavy-duty sheets promote even browning. Dark sheets may require reducing temperature by 25°F to prevent over-browning.
- Parchment paper: Essential for easy cleanup and preventing sticking. The mushrooms release liquid that can caramelize and stick to bare pans.
- Skillet type: Use medium skillet for cooking filling components. Non-stick or well-seasoned cast iron works well for the delicate aromatics.
- Mixing bowls: Medium bowl for filling mixture. Glass or metal bowls are easier to clean than plastic for cheese and butter mixtures.
- Filling tools: Small spoon or piping bag without tip works well. The filling is thick enough to pipe but soft enough to spoon easily.
Nutrition (estimated)
| Nutrient | Amount |
|---|---|
| Calories | ~180 kcal |
| Total Fat | 14 g |
| Saturated Fat | 8 g |
| Carbohydrates | 8 g |
| Total Sugars | 3 g |
| Fiber | 1 g |
| Protein | 6 g |
| Sodium | ~280 mg |
| Vitamin D | ~15% DV |
| Calcium | ~10% DV |
Numbers are estimates and will vary based on specific ingredients, especially cheese fat content, butter amount, and exact mushroom size. Using reduced-fat dairy options lowers calorie and fat content.
Storage & reheating
- Refrigeration: Store leftovers in airtight container up to 3 days. The mushrooms will release additional liquid upon storage.
- Freezing: Not recommended—the texture becomes mushy upon thawing and the filling may separate.
- Reheating: Reheat in 350°F oven for 10-12 minutes until warm. Microwave can make mushrooms rubbery—use only if necessary and in short intervals.
- Texture changes: The mushrooms become softer upon storage and reheating. The filling may dry out slightly—sprinkle with water before reheating if needed.
- Best consumed: Immediately after baking. Quality declines noticeably after first day.
- Make-ahead limit: Maximum 4 hours assembled before baking for best texture results.
FAQ
Can I use white button mushrooms instead of cremini?
Yes, but they may release more water and have a milder flavor. Consider reducing initial baking time by 2-3 minutes and seasoning more generously.
My filling is too dry—what should I do?
Add more cream cheese 1 tablespoon at a time until the desired consistency is reached. The filling should hold together when pressed but not be crumbly.
Can I make these without breadcrumbs?
Yes—substitute with crushed crackers, panko, or almond flour. The texture will be different but still work. You may need to adjust moisture slightly.
Why did my mushrooms release so much liquid?
This is normal—mushrooms are about 90% water. Proper oil brushing and not overcrowding the pan helps it evaporate rather than steam the mushrooms.
Can I prepare these entirely ahead and bake later?
Yes—assemble up to 4 hours ahead and refrigerate. Bring to room temperature before baking. The mushrooms may release some liquid as they sit.
What if I don’t have shallots?
Substitute with 2 tablespoons finely diced red onion or 1 additional garlic clove. The flavor profile will be slightly different but still delicious.
Cook notes
- Don’t rinse mushrooms—wipe clean to prevent sogginess.
- Cook aromatics until dry—moisture here makes soggy filling.
- Brush caps with oil—this creates crucial moisture barrier.
- Don’t overcrowd the pan—space allows proper evaporation.
- Let rest before serving—filling is extremely hot straight from oven.
- Serve warm—the texture and flavor are best at serving temperature.