Cinnamon Pecan Swirl Bread with Vanilla Glaze
Cinnamon Pecan Swirl Bread with Vanilla Glaze
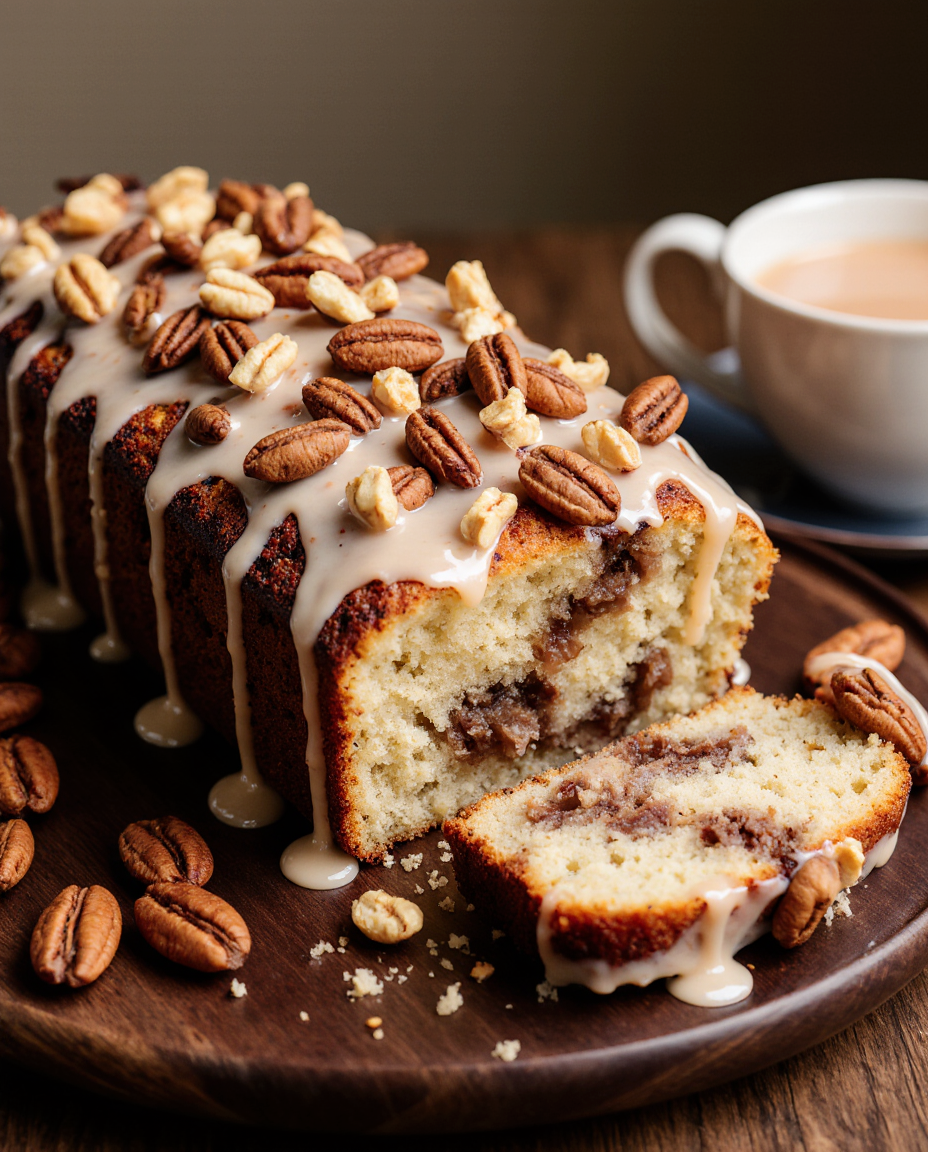
This cinnamon pecan swirl bread achieves perfect swirl definition through precise layering technique that maintains distinct cinnamon ribbons without bleeding into the base dough. The method focuses on filling consistency that stays put during rolling, pecan distribution that prevents sinking, and baking temperature that cooks through while preserving the delicate swirl pattern. The vanilla glaze application timing ensures optimal absorption without making the crust soggy.
Why this recipe works
Dough hydration balance. The precise ratio of flour to liquid creates a dough that’s pliable enough to roll thin without tearing, yet firm enough to support the heavy filling without collapsing. The egg adds richness and structure while the butter provides tenderness without compromising the bread’s ability to hold its shape during the double rise and baking process.
Filling texture engineering. The combination of brown and white sugars with softened butter creates a paste-like consistency that adheres to the dough without melting prematurely. The chopped pecans provide textural contrast while their natural oils help bind the filling. This prevents the common issue of filling leakage during baking while ensuring even distribution throughout the swirl.
Temperature-controlled rises. The two-stage rising process allows the gluten network to develop fully, creating the strong structure needed to contain the dense filling. The first bulk rise develops flavor and texture, while the second shaped rise ensures the bread maintains its form and achieves proper oven spring without the swirl pattern distorting.
Baking temperature strategy. 350°F provides enough heat to cook the dough through without over-browning the exterior or causing the sugar filling to caramelize too quickly. This moderate temperature allows the bread to rise fully in the oven before the crust sets, resulting in a light, tender crumb with well-defined, intact swirl layers.
Ingredients
Bread Dough
- 3 1/4 cupsall-purpose flour
- 1/4 cupgranulated sugar
- 2 1/4 tspinstant yeast
- 1 tspsalt
- 1 cupwhole milk, warm
- 1/4 cupunsalted butter, melted
- 1 largeegg
Cinnamon Pecan Filling
- 1/2 cupbrown sugar
- 1/4 cupgranulated sugar
- 2 tbspcinnamon
- 1 cuppecans, chopped
- 3 tbspunsalted butter, softened
Vanilla Glaze
- 1 cuppowdered sugar
- 2 tbspwhole milk
- 1 tspvanilla extract
- 1/8 tspsalt
Recipe
- Make dough: In large bowl, whisk together flour, sugar, yeast, and salt. Add warm milk, melted butter, and egg. Mix until shaggy dough forms.
- Knead: Turn onto floured surface and knead 8-10 minutes until smooth and elastic. The dough should pass the windowpane test when stretched thin.
- First rise: Place in greased bowl, cover, and let rise in warm place until doubled, about 1 hour.
- Make filling: While dough rises, combine brown sugar, granulated sugar, cinnamon, chopped pecans, and softened butter until mixture resembles wet sand.
- Roll out: Punch down dough and roll into 16×12-inch rectangle on lightly floured surface.
- Add filling: Spread filling evenly over dough, leaving 1/2-inch border on all sides. Press filling gently into dough to adhere.
- Roll up: Starting from long side, roll dough tightly into log, pinching seam to seal. Tuck ends under and place seam-side down in greased 9×5 loaf pan.
- Second rise: Cover and let rise until puffy and nearly reaches pan top, about 30-45 minutes.
- Bake: Bake at 350°F for 40-45 minutes until golden brown and internal temperature reaches 190°F. Tent with foil if browning too quickly.
- Cool: Remove from oven and let cool in pan 10 minutes, then transfer to wire rack to cool completely.
- Glaze: Whisk glaze ingredients until smooth. Drizzle over cooled bread before slicing.
The bread slices cleanest when completely cooled. For warm servings, use serrated knife and saw gently to preserve swirl pattern.
Swirl technique & layering
Rolling thickness
Roll dough to consistent 1/4-inch thickness. Too thin and the swirls become indistinct; too thick and the center may not bake through properly.
Filling distribution
Spread filling evenly, pressing gently to adhere. Avoid overloading the center, which can cause bulging and uneven baking.
Rolling tightness
Roll firmly but not tightly—over-tightening can cause the bread to burst during baking. The log should feel secure but not strained.
Filling stability & texture
Sugar balance. The combination of brown and white sugars creates optimal moisture control. Brown sugar provides molasses flavor and moisture retention, while white sugar offers clean sweetness and helps create the characteristic swirl definition. The ratio prevents the filling from becoming too wet or too dry during baking.
Butter function. Softened butter acts as both binder and moisture barrier. It helps the sugar-spice mixture adhere to the dough while creating a protective layer that prevents the dough from absorbing the filling prematurely. This maintains distinct layers and prevents the soggy bottom common in filled breads.
Pecan preparation. Chopped pecans should be uniform in size—not too fine (which can make the filling pasty) and not too large (which can tear the dough during rolling). Toasting the pecans beforehand enhances their flavor but isn’t necessary for structural integrity.
Cinnamon distribution. The generous amount of cinnamon provides robust flavor without bitterness. Mixing it thoroughly with the sugars ensures even distribution throughout the swirl, preventing pockets of intense spice that can overwhelm the delicate bread flavor.
Baking precision & doneness
Temperature accuracy. Oven temperature calibration is crucial—use an oven thermometer to verify 350°F. Even heating ensures the bread rises properly before the crust sets, allowing for maximum oven spring and well-defined swirls.
Internal temperature. The most reliable doneness indicator is internal temperature. Remove the bread when it reaches 190°F in the center—this ensures the proteins are set and starches are gelatinized without over-drying.
Visual cues. Look for deep golden brown color and the bread pulling slightly away from the pan sides. The surface should feel firm but spring back when gently pressed. A hollow sound when tapped indicates proper doneness.
Cooling importance. Proper cooling is essential for sliceability. The structure continues to set as it cools, and the filling firms up. Cutting too early causes the swirls to smear and the bread to compress.
Glaze consistency & application
Texture control. The glaze should be thick enough to coat the back of a spoon but thin enough to drizzle. Add milk gradually—too thin and it will soak into the bread; too thick and it won’t spread properly. The small amount of salt balances the sweetness and enhances the vanilla flavor.
Application timing. Apply glaze only when the bread is completely cool. Warm bread will absorb the glaze, making it disappear into the crust rather than forming the characteristic white drizzle on the surface.
Drizzling technique. Use a fork or piping bag for controlled application. Work from one end to the other in zigzag patterns, allowing some of the bread surface to show through for visual appeal.
Setting time. Let the glaze set for 20-30 minutes before slicing or storing. This allows it to form a slight crust that won’t stick to packaging or knives.
Common mistakes (and quick fixes)
- Filling leakage: Overfilled or rolled too loosely. Leave 1/2-inch border and roll firmly without stretching.
- Dense bread: Under-kneaded or over-proofed. Knead until windowpane test passes and watch rise times carefully.
- Pale bottom: Dark pan or low oven rack. Use light-colored pan and center rack position.
- Burnt top: Oven too hot or over-baked. Tent with foil after 25 minutes if browning too quickly.
- Tough crust: Baked too long or cooled in pan. Remove from pan after 10 minutes cooling.
- Indistinct swirls: Filling too wet or dough rolled too thin. Use proper butter consistency and maintain 1/4-inch thickness.
- Yeast failure: Milk too hot or old yeast. Check expiration dates and use thermometer for milk temperature.
Substitutions & variations
Different nuts
- Walnuts instead of pecans
- Almonds for milder flavor
- Pistachios for color contrast
Additional spices
- 1/2 tsp nutmeg
- 1/4 tsp cardamom
- 1/2 tsp allspice
Different glazes
- Cream cheese glaze
- Maple glaze
- Orange glaze
Extra ingredients
- 1/2 cup raisins
- 1/4 cup dried cranberries
- 2 tbsp orange zest
Special diets
- Vegan: plant-based milk/butter
- Dairy-free: coconut oil instead of butter
- Gluten-free: 1:1 gluten-free flour
Equipment notes
- Loaf pan: Use light-colored metal 9×5-inch pan for even browning. Dark pans may require reducing temperature by 25°F.
- Stand mixer: Optional but helpful for kneading. Use dough hook on medium-low speed for 6-8 minutes.
- Instant-read thermometer: Essential for checking doneness. Insert into bread center—190°F indicates fully baked.
- Rolling pin: French-style rolling pin without handles provides better control for even thickness.
- Bench scraper: Helpful for handling sticky dough and cleaning flour from work surface.
Nutrition (estimated per slice)
| Nutrient | Amount | % Daily Value |
|---|---|---|
| Calories | 285 kcal | 14% |
| Total Fat | 12 g | 15% |
| Saturated Fat | 5 g | 25% |
| Trans Fat | 0 g | 0% |
| Cholesterol | 35 mg | 12% |
| Sodium | 185 mg | 8% |
| Total Carbohydrate | 42 g | 15% |
| Dietary Fiber | 2 g | 7% |
| Total Sugars | 21 g | 42% |
| Protein | 5 g | 10% |
| Vitamin D | 0.2 mcg | 1% |
| Calcium | 45 mg | 4% |
| Iron | 1.8 mg | 10% |
| Potassium | 105 mg | 2% |
Percent Daily Values based on a 2,000 calorie diet. Values are estimates and will vary based on specific ingredients and portion sizes.
Storage & serving
- Room temperature: Store in airtight container up to 3 days. The glaze helps retain moisture.
- Freezing: Freeze unglazed bread up to 3 months. Wrap tightly in plastic then foil. Thaw and add glaze before serving.
- Refrigeration: Not recommended—refrigeration accelerates staling in yeast breads.
- Refreshing: Warm slices in 300°F oven for 5-10 minutes to refresh day-old bread.
- Serving suggestions: Excellent toasted with butter, as French toast, or with cream cheese.
- Make-ahead: Prepare through first rise and refrigerate overnight. Bring to room temperature before shaping and second rise.
FAQ
Can I use active dry yeast instead of instant yeast?
Yes, but activate it first in the warm milk with a pinch of sugar before adding to dry ingredients. Increase rise times by 15-20 minutes.
Why did my swirl disappear during baking?
This usually means the dough was over-proofed or the filling was too wet. Watch the second rise carefully and ensure butter is softened but not melted.
Can I make this without nuts?
Yes, simply omit the pecans. The bread will still have excellent cinnamon swirl flavor and texture.
How do I prevent a doughy center?
Use an instant-read thermometer and bake until center reaches 190°F. Also ensure your oven temperature is accurate with an oven thermometer.
Can I double this recipe?
Yes, but make two separate loaves rather than one large one. The baking time may need slight adjustment.
Why is my bread dry?
Over-measuring flour or over-baking are common causes. Use the spoon-and-level method for flour and watch baking time carefully.
Cook notes
- Measure flour properly—spoon into cup and level with knife for accuracy.
- Don’t rush the rises—proper fermentation develops flavor and texture.
- Use instant-read thermometer for perfect doneness every time.
- Cool completely before glazing to prevent absorption into warm bread.
- Slice with serrated knife using gentle sawing motion to preserve swirls.
- Freeze for longer storage—the bread thaws beautifully when properly wrapped.