Chocolate Orange Cookies
Chocolate Orange Cookies
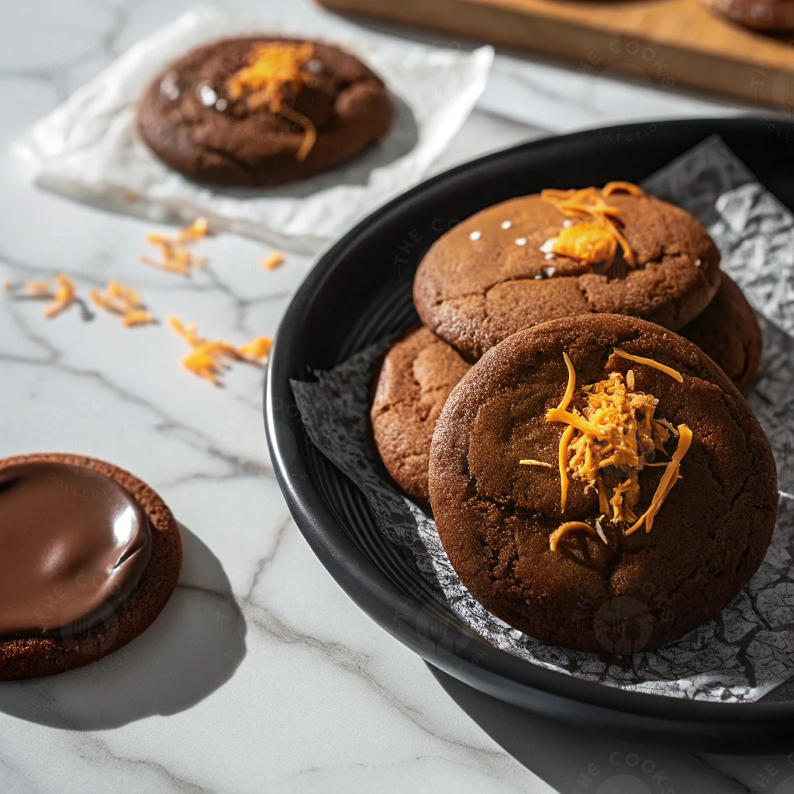
These chocolate orange cookies achieve perfect flavor balance through precise citrus extraction and cocoa selection. The method focuses on using both orange zest and juice to create a bright, natural orange flavor that cuts through rich chocolate without overpowering it. The result is soft, fudgy chocolate cookies with a refreshing citrus note that enhances rather than competes with the deep cocoa flavor, creating a sophisticated treat that’s surprisingly easy to make.
Why this recipe works
Dual citrus extraction. Using both orange zest and juice creates a complete orange flavor that permeates the entire cookie. The zest contains aromatic oils that provide the true essence of orange, while the juice adds moisture and subtle acidity that brightens the chocolate flavor. This combination ensures the orange note is present throughout the eating experience rather than just as an initial burst. The small amount of juice (just 1 tablespoon) adds flavor without making the dough too wet or affecting the cookie’s structure.
Cocoa powder selection. Using unsweetened cocoa powder rather than melted chocolate creates an intense chocolate flavor without adding extra fat that would change the cookie’s texture. The 1:2 ratio of cocoa to flour (1/2 cup cocoa to 1 cup flour) provides rich chocolate flavor while maintaining proper cookie structure. Natural cocoa powder works particularly well here because its slight acidity complements the orange and reacts with the baking soda for proper rise. The result is cookies that taste deeply chocolatey without being overly sweet or heavy.
Sugar balance strategy. The combination of granulated and brown sugars creates complexity and controls texture. Granulated sugar promotes spread and crisp edges, while brown sugar contributes moisture and chewiness through its molasses content. The 2:1 ratio (1/2 cup white to 1/4 cup brown) provides enough structure for the cookies to hold their shape while keeping the centers soft. The slight caramel notes from the brown sugar also complement both the chocolate and orange flavors, tying them together harmoniously.
Proper mixing technique. Creaming the butter and sugars properly incorporates air into the dough, creating a lighter texture that contrasts nicely with the rich chocolate flavor. Adding the dry ingredients “until just combined” prevents overmixing, which would develop too much gluten and make the cookies tough rather than tender. This gentle approach preserves the delicate balance between cakey and chewy textures that makes these cookies special.
Baking temperature control. The 350°F oven temperature is ideal for chocolate cookies because it’s hot enough to set the edges quickly while allowing the centers to remain soft. The relatively short baking time (9-11 minutes) ensures the cookies don’t dry out or become bitter from overcooked cocoa. Removing them when the edges are set but centers still look soft guarantees the fudgy texture that makes chocolate cookies so satisfying.
Ingredients (cups & tablespoons only)
Dry Ingredients
- 1 cupall-purpose flour
- 1/2 cupunsweetened cocoa powder
- 1/2 tspbaking soda
- 1/4 tspsalt
Wet Ingredients
- 1/2 cupunsalted butter, softened
- 1/2 cupgranulated sugar
- 1/4 cupbrown sugar
- 1 largeegg
- 1 tspvanilla extract
- 1 tbsporange juice
- 1 tsporange zest
Recipe
- Prep oven and pans: Preheat oven to 350°F (175°C). Line baking sheets with parchment paper. The parchment prevents sticking and makes cleanup easier.
- Combine dry ingredients: In medium bowl, whisk together 1 cup flour, 1/2 cup cocoa powder, 1/2 tsp baking soda, and 1/4 tsp salt. Whisking removes lumps and evenly distributes the leavening.
- Cream butter and sugars: In large bowl, cream together 1/2 cup softened butter, 1/2 cup granulated sugar, and 1/4 cup brown sugar until light and fluffy (2-3 minutes). Proper creaming creates air pockets for lift.
- Add wet ingredients: Beat in 1 egg until fully incorporated. Then stir in 1 tsp vanilla extract, 1 tbsp orange juice, and 1 tsp orange zest. Mix until just combined.
- Combine mixtures: Gradually add dry ingredients to wet ingredients, mixing until just combined. Be careful not to overmix. The dough will be thick but soft.
- Portion cookies: Drop dough by rounded tablespoons onto prepared baking sheets. Leave about 2 inches between cookies for spreading.
- Bake: Bake 9-11 minutes until edges are set but centers still look soft. The cookies will continue to cook on the hot baking sheet.
- Cool properly: Let cookies cool on baking sheets for 5 minutes before transferring to wire rack. This allows them to set without breaking.
- Optional ganache: If using ganache, prepare while cookies cool. Melt chocolate chips with heavy cream or milk, then spread on cooled cookies.
- Garnish and serve: Garnish with shredded orange peel if desired. Let ganache set before serving or storing.
The cookies will appear underdone when removed from the oven but will firm up as they cool. For crispier cookies, bake 1-2 minutes longer. For softer cookies, bake 1 minute less.
Nutrition (estimated)
| Nutrient | Amount |
|---|---|
| Calories | ~150 kcal |
| Total Fat | 7 g |
| Saturated Fat | 4 g |
| Trans Fat | 0 g |
| Cholesterol | 25 mg |
| Sodium | 85 mg |
| Total Carbohydrates | 20 g |
| Dietary Fiber | 2 g |
| Total Sugars | 12 g |
| Added Sugars | 10 g |
| Protein | 2 g |
| Vitamin D | 0.1 mcg |
| Calcium | 15 mg |
| Iron | 1 mg |
| Potassium | 90 mg |
Nutrition calculated without optional ganache. Adding ganache will increase calories, fat, and sugar content. Values are estimates and will vary based on specific ingredient brands.
Chocolate selection & cocoa types
Cocoa powder types
Natural cocoa: acidic, fruity notes. Dutch-process: alkaline, milder flavor. Black cocoa: intense, oreo-like. Regular unsweetened: balanced, versatile. Each type creates different flavor profiles.
Flavor pairing
Natural cocoa complements orange’s acidity. Dutch-process creates smoother chocolate flavor. Black cocoa makes dramatic dark cookies. Regular works well for balanced results. Choose based on preference.
Measuring cocoa
Spoon cocoa into measuring cup, then level. Don’t pack or tap down. Sift if lumpy. Proper measurement ensures correct chocolate intensity and dough consistency.
Orange preparation & flavor extraction
Proper orange preparation maximizes flavor while avoiding bitterness. The goal is to capture the bright, aromatic qualities of orange without the harshness of the white pith.
Zesting techniques
- Microplane zester: Creates fine zest with maximum oil release. Best for distributing flavor evenly throughout dough.
- Box grater: Use smallest holes. Watch for pith – stop when you see white.
- Vegetable peeler: Create strips, then mince finely. Good for garnish but less efficient for dough.
- Citrus zester: Creates long strands. Pretty but may create texture issues in cookies.
Always zest oranges before juicing them – it’s much easier. Wash and dry oranges thoroughly before zesting, especially if not organic. The colored part of the peel (zest) contains the flavorful oils, while the white pith underneath is bitter.
Mixing methods & dough consistency
The mixing process creates the cookie’s final texture through proper ingredient incorporation and air entrapment. Each step serves a specific purpose in developing the ideal cookie structure.
Mixing stages
- Creaming stage: Butter and sugars beaten until light and fluffy (2-3 minutes). Incorporates air for lift.
- Wet ingredient stage: Egg added gradually to maintain emulsion. Orange components incorporated gently.
- Dry ingredient stage: Flour mixture added until just combined. Overmixing develops gluten, making cookies tough.
- Resting stage: Optional 15-minute rest allows flour to hydrate. Not essential but can improve flavor.
- Portioning stage: Dough scooped consistently for even baking. Chilled dough is easier to handle if too soft.
The finished dough should be soft but not sticky, holding its shape when scooped but spreading slightly when baked. If the dough seems too soft, chilling for 15-30 minutes makes it easier to handle.
Baking science & cookie texture
The 350°F baking temperature creates the ideal environment for proper cookie spread, chocolate flavor development, and texture formation through controlled heat application.
Baking stages
Butter melting: cookies begin to spread. Protein setting: structure forms. Sugar caramelization: flavor develops. Leavening action: slight rise occurs. Final set: structure completes.
Texture control
9 minutes: very soft, chewy centers. 10 minutes: balanced softness with set edges. 11 minutes: firmer, cakier texture. 12+ minutes: crisp, snappy cookies (not recommended).
Oven positioning
Center rack for even heating. One sheet at a time for consistent results. Rotate halfway if oven has hot spots. Upper rack may cause excess browning.
Common mistakes (and quick fixes)
- Bitter cookies: Overbaked or wrong cocoa type. Use natural cocoa, reduce baking time. If bitter, serve with sweetened whipped cream.
- Pale cookies: Underbaked or old baking soda. Extend baking 1-2 minutes, use fresh leavening. For pale cookies, dust with powdered sugar.
- Too cakey: Overmixed or too much flour. Mix gently, measure flour correctly. If cakey, use for ice cream sandwiches.
- Too flat: Butter too soft or insufficient flour. Use cooler butter, verify measurements. For flat cookies, they’ll still taste delicious.
- Orange not noticeable: Insufficient zest or old oranges. Use fresh oranges, increase zest slightly. Boost flavor with orange extract if needed.
- Dry cookies: Overbaked or too much cocoa. Reduce baking time, verify cocoa measurement. Serve with milk or coffee.
- Sticking to pan: No parchment or underbaked. Always use parchment, ensure proper baking time. If stuck, chill pan to release.
- Burnt bottoms: Dark pans or oven too hot. Use light-colored pans, verify temperature. If bottoms darken too quickly, use double pans.
Substitutions & variations
Different flours
- Whole wheat: nuttier, denser texture
- Gluten-free blend: 1:1 substitution
- Bread flour: chewier results
- Oat flour: softer, more crumbly
Different citrus
- Lemon: brighter, more tart
- Lime: tropical, intense
- Grapefruit: sophisticated, bitter notes
- Tangerine: sweeter, milder
Different chocolate
- Melted chocolate: richer, fudgier
- Dark cocoa: intense flavor
- Milk chocolate: sweeter results
- White chocolate: subtle cocoa
Mix-in variations
- Chocolate chips: extra chocolatey
- Nuts: textural contrast
- Dried cranberries: tart complement
- Coconut: tropical twist
Special diets
- Vegan: plant-based substitutes
- Gluten-free: GF flour blend
- Dairy-free: vegan butter
- Reduced sugar: sugar alternatives
Different forms
- Slice-and-bake: make ahead dough
- Bar cookies: easier portioning
- Thumbprints: jam-filled centers
- Sandwich cookies: ganache filling
Any substitution may affect cooking time, texture, and flavor balance. When substituting citrus, adjust quantities based on intensity – lemons and limes are more potent than oranges.
Serving & presentation
Garnish ideas
Orange zest: fresh, colorful. Powdered sugar: elegant contrast. Chocolate drizzle: decorative. Sea salt: flavor enhancement. Candied orange: special occasion.
Presentation styles
Stacked tower: dramatic effect. Scattered arrangement: casual serving. Individual plating: restaurant style. Gift boxes: thoughtful presents. Tiered stand: party display.
Accompaniments
Vanilla ice cream: classic pairing. Orange sorbet: citrus emphasis. Whipped cream: light contrast. Coffee: bitter balance. Milk: childhood nostalgia.
Equipment notes
- Mixing bowls: Medium for dry ingredients, large for wet. Glass or stainless steel won’t absorb flavors. Non-slip bottoms prevent movement while mixing.
- Measuring tools: Dry measuring cups for flour and cocoa. Liquid measuring cup for juice. Measuring spoons for small quantities. Digital scale for most accuracy.
- Baking sheets: Light-colored aluminum promotes even browning. Rimmed sheets contain any spills. Parchment paper prevents sticking and promotes even baking.
- Mixer options: Stand mixer for easy creaming. Hand mixer works perfectly. Whisk and spoon possible but requires more effort. Don’t overmix by machine.
- Zesting tools: Microplane creates finest zest. Box grater works well. Citrus zester creates decorative strands. Knife least efficient but possible.
- Cookie scoops: Tablespoon-sized scoop for consistent portions. Spring-release easiest to use. Two spoons work as alternative. Consistency ensures even baking.
- Cooling racks: Wire racks allow air circulation. Prevents soggy bottoms. Essential for proper cooling. Multiple racks helpful for batch baking.
Storage & reheating
- Room temperature: Store in airtight container up to 5 days. Place parchment between layers if stacking. The flavor actually improves slightly after 1 day.
- Freezing baked cookies: Freeze up to 3 months. Place in single layer on parchment-lined sheet to freeze solid, then transfer to freezer bags. Thaw at room temperature.
- Freezing dough: Portion dough balls and freeze on parchment-lined sheet. Transfer to freezer bags once solid. Bake frozen, adding 1-2 minutes to baking time.
- Refreshing cookies: Warm in 300°F oven for 3-5 minutes to restore freshness. Microwave makes cookies rubbery – avoid if possible. The gentle oven heat crisps edges slightly while warming centers.
- Ganache storage: Cookies with ganache should be stored single-layer until set. Once set, they can be stacked with parchment between layers. Ganache may soften in warm conditions.
Frequently asked questions
Can I use orange extract instead of fresh orange?
Yes, but the flavor will be different. Use 1/2 teaspoon orange extract instead of zest and juice. Fresh orange provides brighter, more complex flavor while extract offers convenience and consistency.
Why are my cookies dry and crumbly?
This usually means they were overbaked or had too much flour. Measure flour by spooning into cup and leveling – don’t scoop directly from bag. Reduce baking time by 1 minute next batch.
Can I make these without a mixer?
Absolutely! Use a wooden spoon and some elbow grease. Cream the butter and sugars thoroughly until lightened in color. The cookies may be slightly denser but still delicious.
How can I make the orange flavor stronger?
Increase zest to 1 1/2 teaspoons or add 1/4 teaspoon orange extract. You could also add a tablespoon of orange liqueur, reducing the orange juice slightly to compensate for extra liquid.
My cookies spread too much – what happened?
Butter was likely too warm or you used a dark baking sheet. Ensure butter is softened but still cool to touch. Use light-colored baking sheets and don’t over-cream the butter and sugars.
Can I double this recipe?
Yes, it doubles well. Mix in two batches if your bowl isn’t large enough. You may need to bake in more batches since overcrowding the oven affects baking time and texture.
Why use both granulated and brown sugar?
Granulated sugar creates crisp edges and promotes spread. Brown sugar adds moisture and chewiness. The combination creates the ideal chocolate cookie texture – crisp edges with soft centers.
Cook notes & pro tips
Flavor development
The orange flavor becomes more pronounced after cookies cool completely. For best flavor, wait at least 2 hours after baking before serving. The chocolate and orange continue to meld as they sit.
Texture secrets
For extra-chewy cookies, use bread flour instead of all-purpose. For cakier texture, use cake flour. The standard all-purpose creates the ideal balance between chewiness and tenderness.
Timing tips
Make dough up to 3 days ahead and refrigerate. Bring to room temperature before baking. Baked cookies freeze beautifully for up to 3 months. Perfect for holiday preparation.